Check Payments are a convenience for your students/families.
It is important to note, that even if the check feature is disabled (meaning families aren't able to enter a check payment themselves), administrators can still enter a check payment for a family.
Admins can enable/disable the feature in the Financial > Settings page as shown below: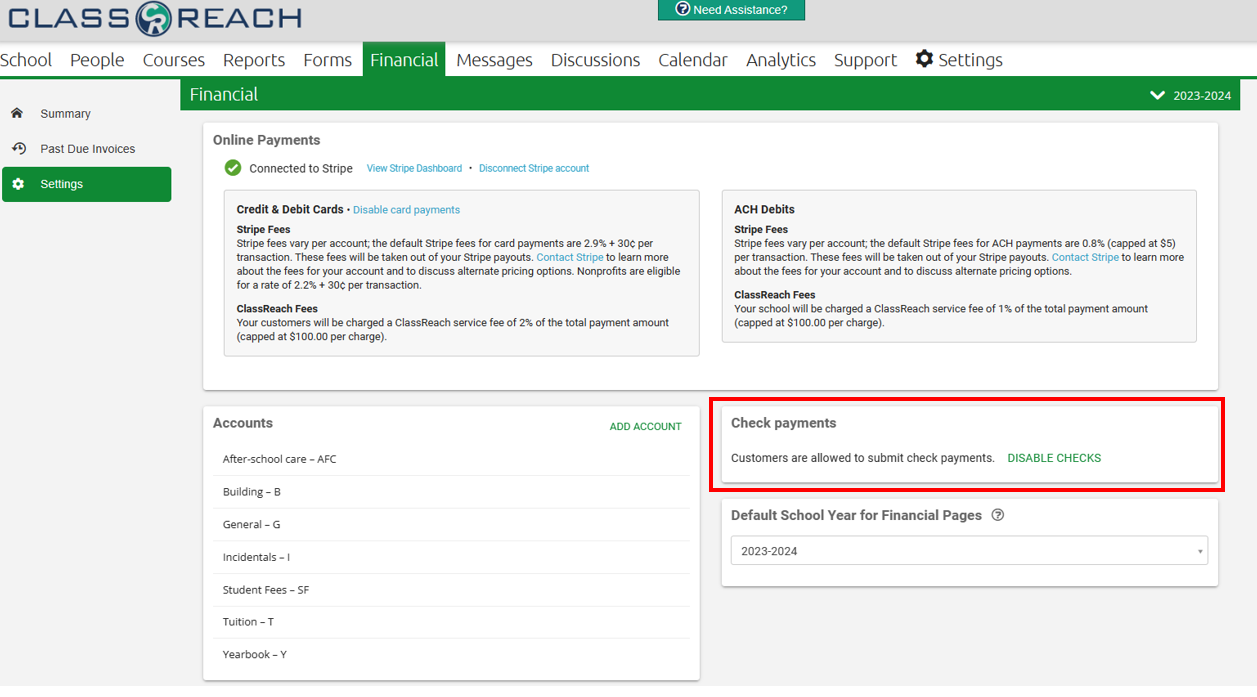
When this feature is enabled, your customers will have the option to indicate a payment they are making against an invoice is a check. We'll following this example all the way through the system.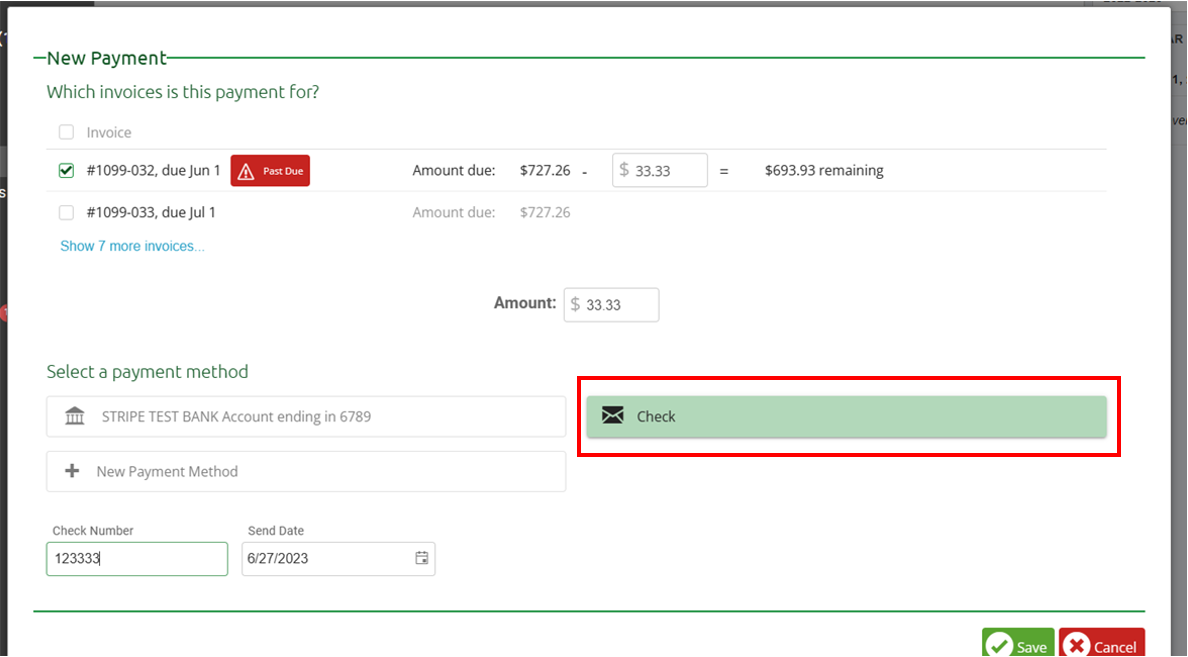
1. Customer makes a check payment
In the above example, the Bird Family is making a $33.33 payment against invoice #1099-032 and they have chosen Check as the payment method. When this happens, the payment amount will be applied against the balance and the status of the check will show as "sent".
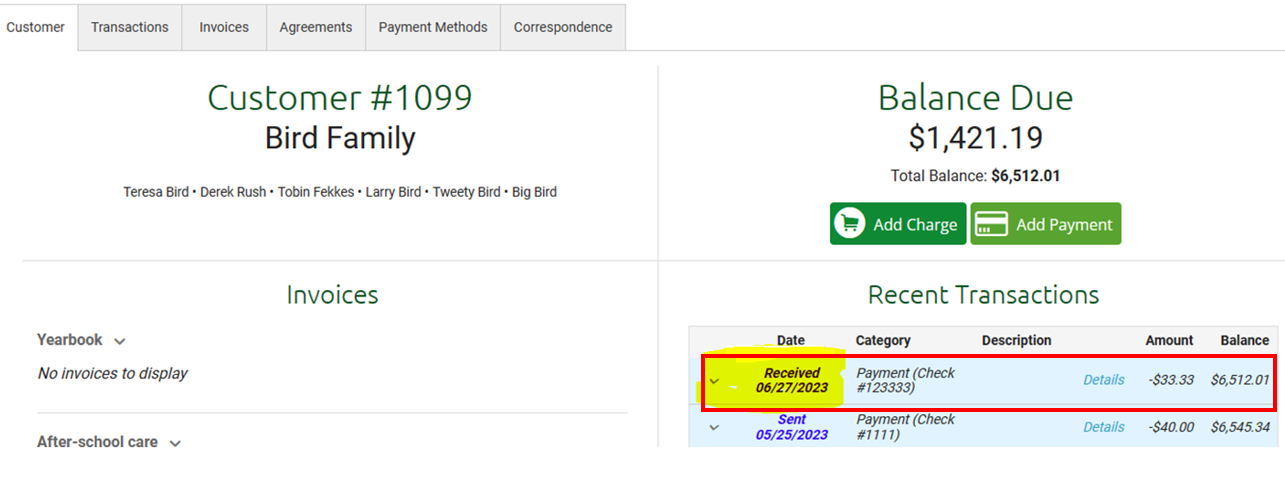
The family's financial summary will look as follows, note the payment is applied, status is sent.
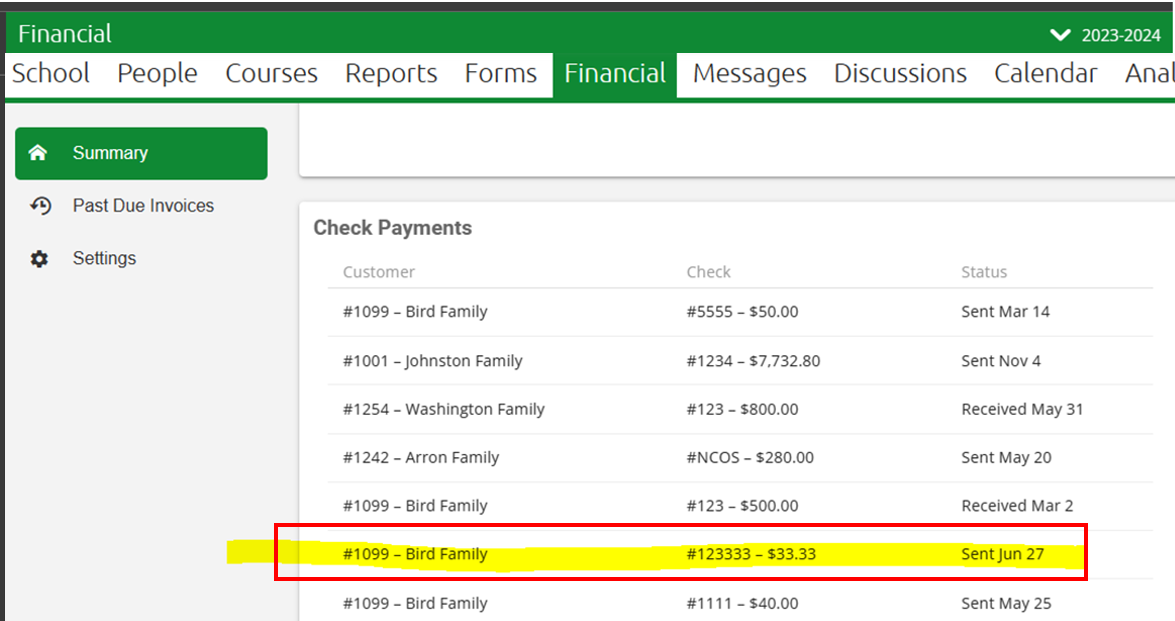
From the Admin's perspective, the check now shows up in the Check Payments section of the Financial page; note the status of "sent".
2. Admin receives the check and marks as received
The status of the check will remain as "sent" until an Admin marks it "Received", "Cleared", or "Failed". The Admin can do this by clicking on the row of the check:

If the Admin tracking checks and bank statements marks the check as "Received", there is no change in balance, since the balance had already been adjusted when the check payment was submitted.
When the check status goes from "Sent" to "Received" the status of the check on the Family's summary changes:
3. If the school fails to receive the check, or the bank returns for insufficient funds
The Admin would go into the Check Payment from the Financial Summary Page and mark it as "failed":

The "failed" status DOES affect the balance by basically reversing the payment application as shown below:
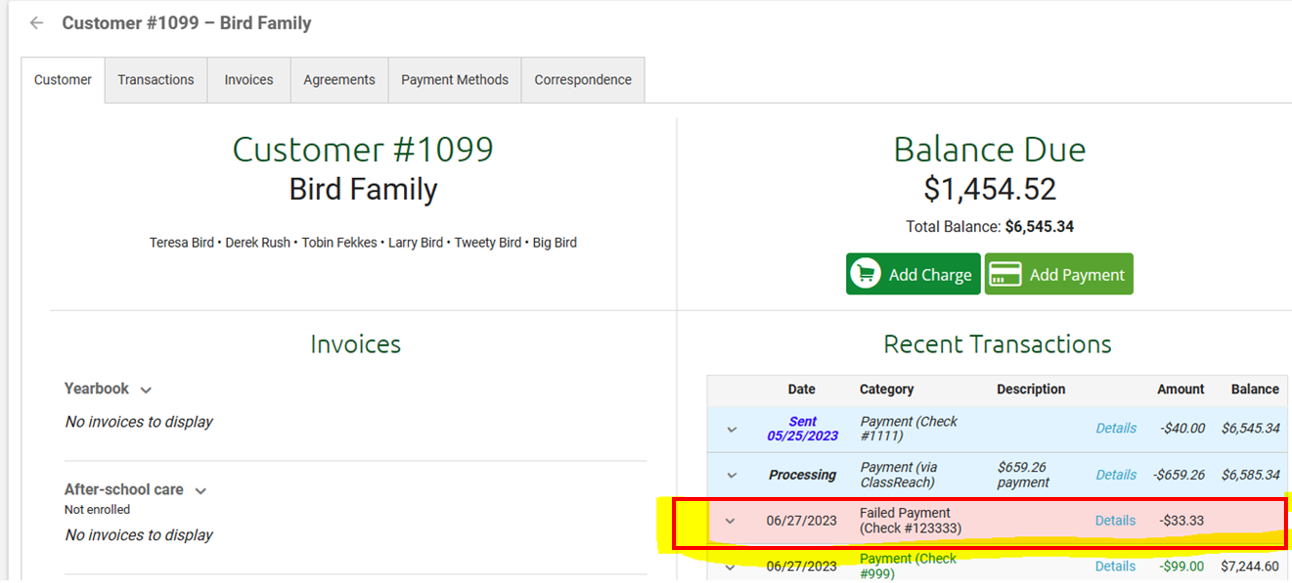
This status also causes the payment to disappear from the Check Payment list on the Summary page.
4. If the check clears the bank successfully
It is best to indicate cleared checks for your record keeping as well as clearing the check from the Check Payment list so that you are only tracking outstanding checks. The "Cleared" date is just an FYI for the admin of when you deposited the check.
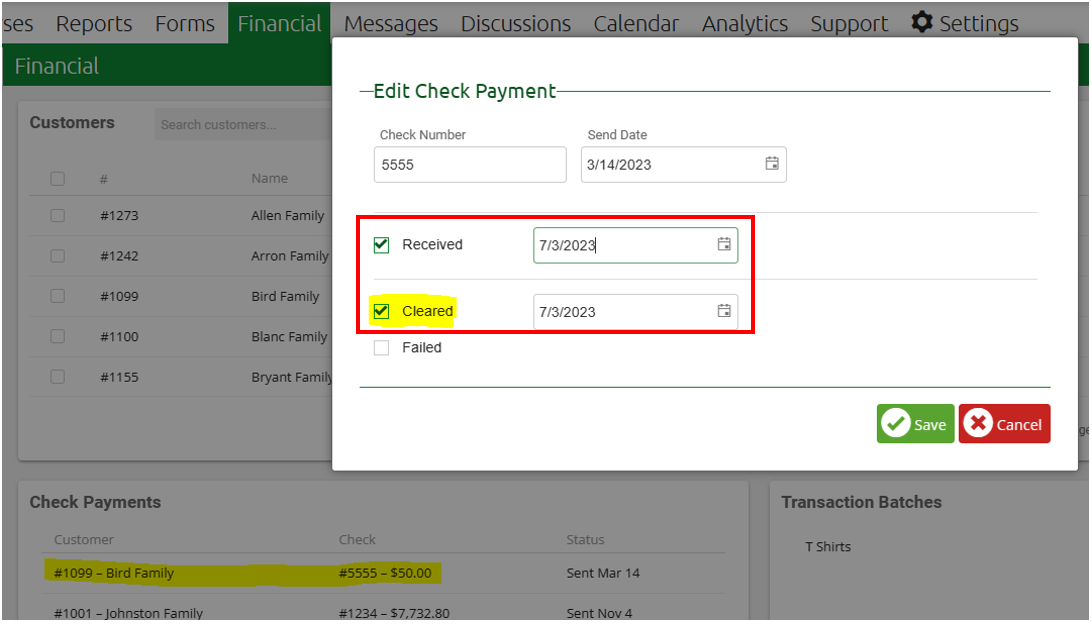
Once the check has cleared it no longer shows in the register as highlighted in blue and the date of the payment changes to the date the check payment was entered by the admin.
Since the payment date becomes the date the payment was entered by the admin after the check has cleared, it is important to enter the check payment into the ClassReach register on the day the check is received by the school or as close to it as possible.
The check payment date on the "Customer Detailed Invoice and Receipt Report" is the "Received" date in order to be consistent with basic accounting principles.
