Adding Payments
Admins may manually add payments to a customer's account. They have the ability to indicate method of payment, amount, and which invoice to add it to.
Important Note: To access your school's Financial Suite, you must be either be designated a Super Admin or have been granted “View and Edit” permissions for Financial Permissions. If neither of these apply to you, you must contact someone in your school with Super Admin privileges.
One important aspect which applies to all pages of the financial suite is the School Year drop-down in the upper right of every page. Be sure to select the appropriate school year when viewing or editing any information on that page!
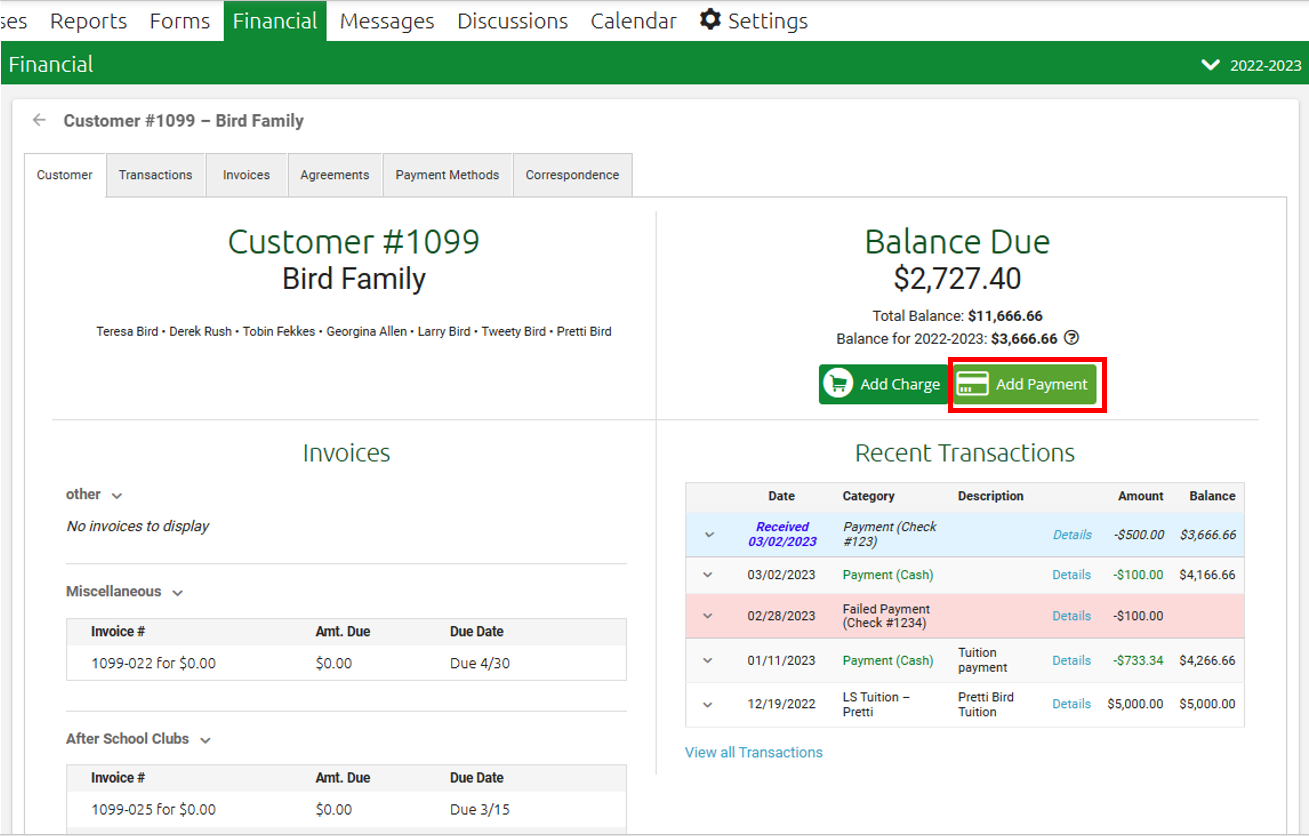
There are several ways to navigate to a customer's Financial page to Add a Payment. The easiest is through the Financial Summary page, and then select the family you would like to add a payment for.


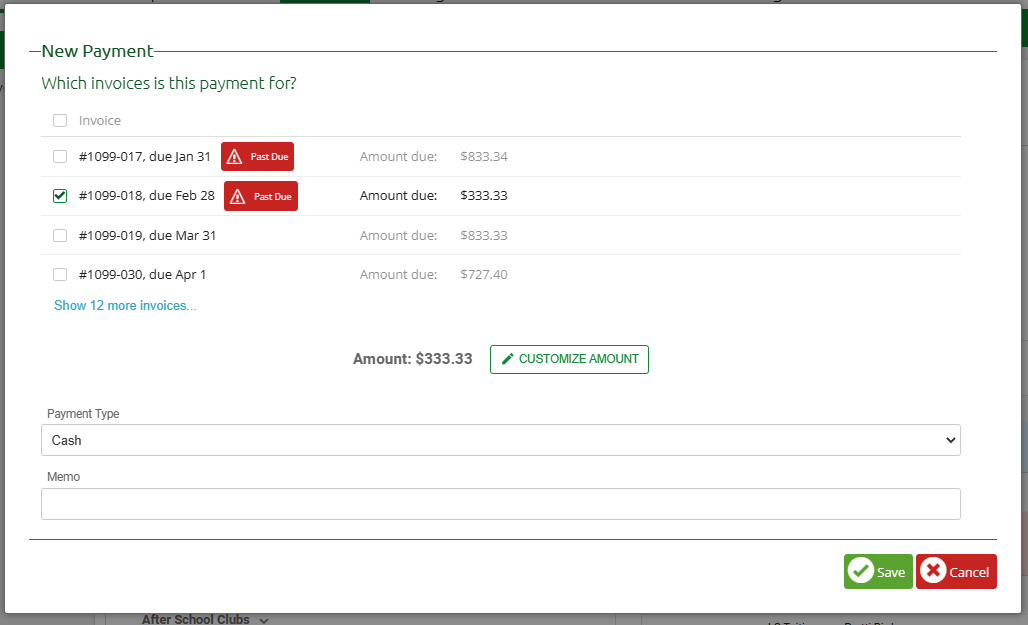
The Add Payment button will bring up a New Payment entry window where you can choose which invoice(s) you are paying for. You can also customize the amount, select the payment type and make a memo.

- Payment Type:
- Cash: The customer paid in cash
- Check: You can input the Check Number, Date, and then keep track of it as it was Received and if it Cleared or Failed.
- Electronic Payment: If they paid via PayPal or another source
- Misc. Credit: Another form of credit
- Other: Some other form of payment
Please note, the Payment Type of "Electronic Payment" does NOT mean it will initiate a Stripe payment; The manual payment feature is for payment methods EXTERNAL to ClassReach. In the case of Electronic Payment, the school may have a PayPal account set up to receive customer funds.
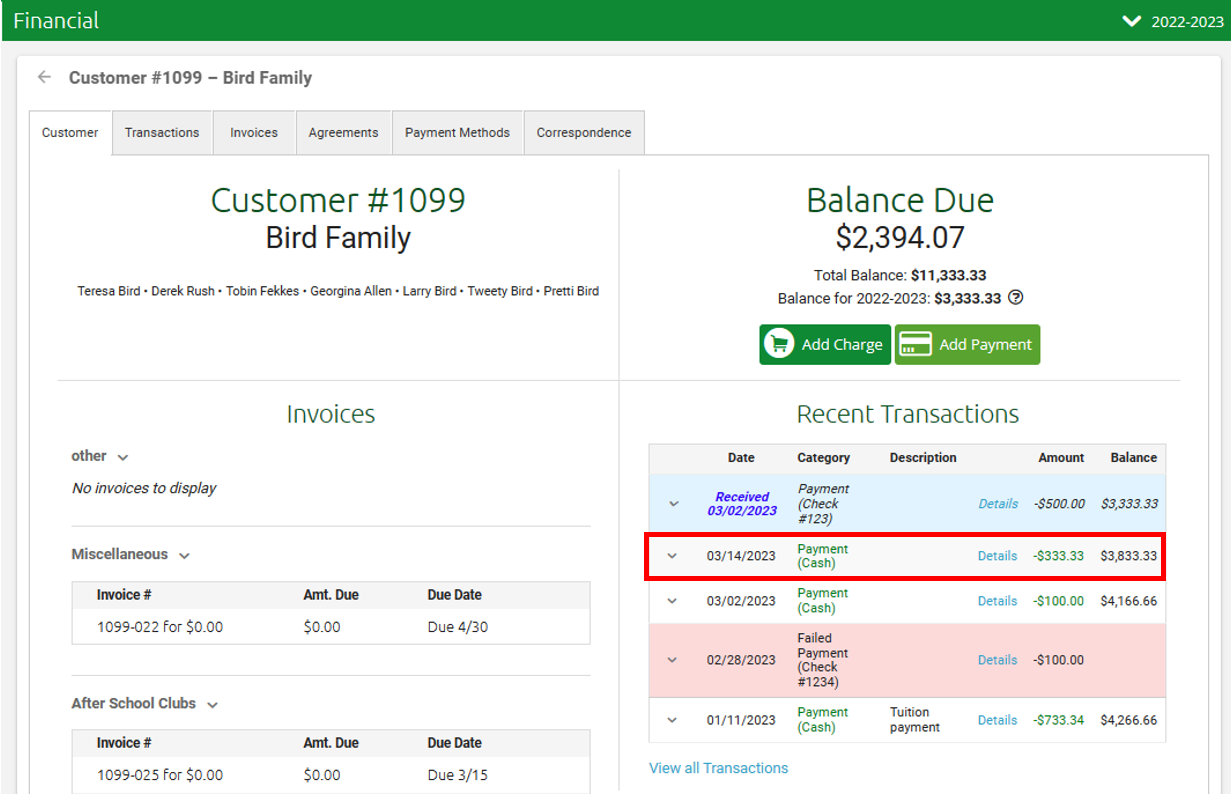
Once you select the green Save button, the payment will apply and be reflected in the customer account immediately as shown: