Importing Users and Courses
The Imports function of ClassReach allows batch uploads of people and courses data to help get new schools started quickly and minimize manual data entry
Using the Importer to bring in data is accessed by going to the Settings Page > Imports
In general, the Importer follows this process:
- Download a CSV template file
- Fill the CSV file with data
- Upload the CSV template to ClassReach
- Check for errors and review the uploaded data
- Save the data
The importer can import a single item type at a time - Users (People) or Courses. Selecting Users will also require you to designate a specific school year to assign to the users. This allows you to import an Academic Level for each student.
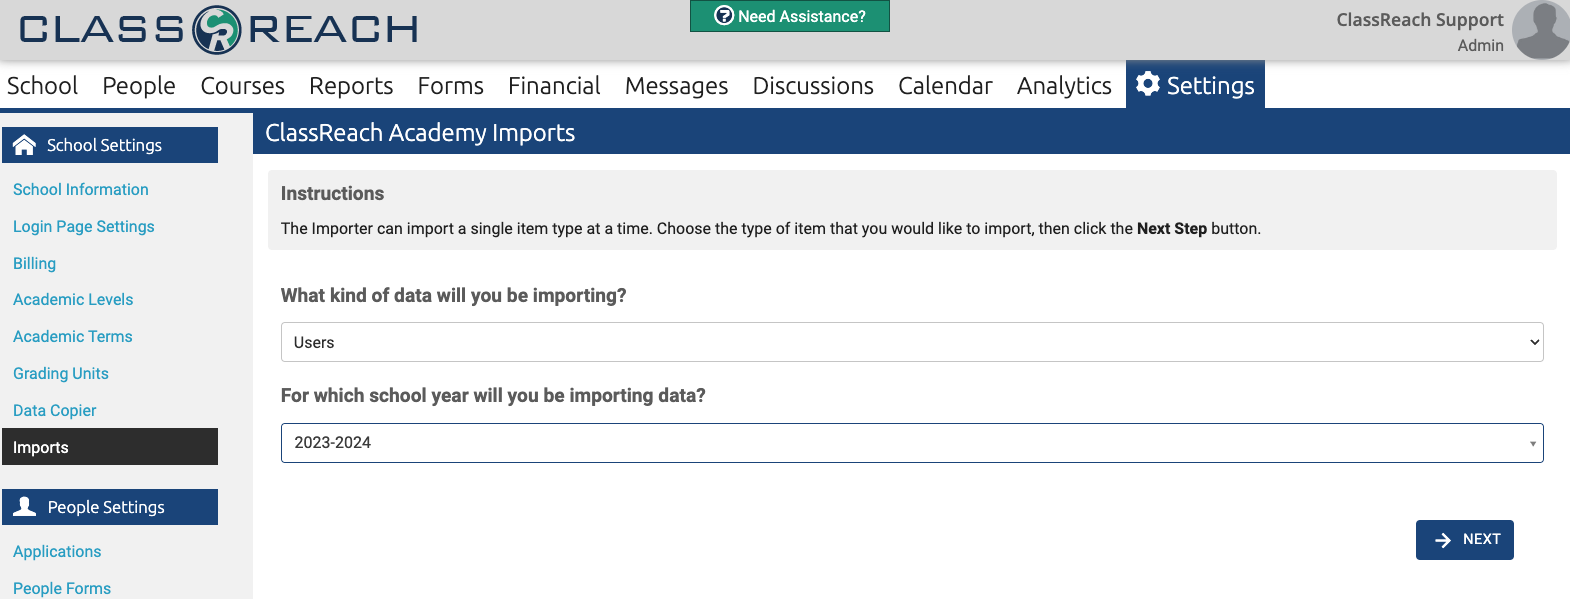
Importing Users
After you designate the school year, you will click to the next page

From this screen, you can download the CSV template file that will be used for your data import.
"A Comma Separated Values (CSV) file is a plain text file that stores data by delimiting data entries with commas. CSV files are often used when data needs to be compatible with many different programs. CSVs can be opened in text editors, spreadsheet programs like Excel, or other specialized applications." (Hoffman, 2022)
A CSV file is displayed in a spreadsheet program (MS Excel, Google Sheets, etc) as rows and columns.
Each row in the CSV file is for a unique User that you are importing.
Each column in the CSV file is for a unique field in the database. A CSV file technically separates the fields by commas (First name, Middle name, Last name, Username, Email, ...), but in a spreadsheet program they are displayed as columns instead of commas.
The CSV template file has a header which consists of five rows of data that tell you what data to enter in each column of the file. DO NOT DELETE or MODIFY the HEADER.

In the example below, there are two columns - column G is for a User ID and column H is for a student's Academic Level. The five header rows have different purposes and provide useful information for you to enter your import data in the right place and in the right way.
Row 1 - matches the column in the spreadsheet to the data field in ClassReach (for the import)
Row 2 - shows you the page of the User Info Form where this field is located
Row 3 - is the title of the corresponding field on the User Info Form
Row 4 - is a description of the type of data field
Row 5 - has directions for you such as, Required, Optional or a list of accepted values
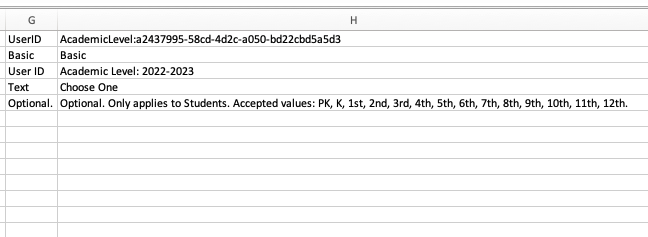
Entering Data in the CSV Template File
Begin entering your data on the sixth row, DO NOT LEAVE A BLANK ROW or this will cause an error on import.
The advantage of using the CSV import is that the data can be copied and pasted into this file from any source where you've stored the data previously. You can enter data manually, row by row and field by field, one at a time, but it will go much faster if you can copy and paste multiple users and their data in groups.
A suggested method is to start with Column B (First Name) OR Columns B, C and D (First, Middle, Last Name) together and paste in all of your users names. Then move to the next column, Username. If you don't have any usernames, then you can skip this column (its optional). Next is Email. Email is optional, primarily because most students don't have an email (Note, in order for a user to login to ClassReach, they will need a username and/or an email address. These can be added later individually.). You can paste in all the emails at this point. Make sure the rows line up so that the right names line up with their email. Continue pasting data and entering data, column by column.
Pay careful attention to the Required fields and the Accepted Values. For example, the Roles field is Required and you can only enter one or more of four accepted values - Admin, Teacher, Guardian, Student.
Family Name is an Optional field, but if you use it, you need to add a number in the Family ID column (we recommend starting with 001 and going in numerical order on your list. If you import multiple batches, you need to make sure you make the Family ID's all unique). The import will Fail if the Family ID is missing.
Important! All of the fields used in the Import CSV file come from the fields on your User Info Form. Row 2 of the Header shows the page on the User Info Form and Row 3 shows the Field name from the User Info Form. The Accepted Values listed in Row 5 are determined by you when you set up that field. If you want to change those values, you will edit the User Info Form and save it prior to downloading the CSV template file.
Upload your User Data
When you've got all the data entered in the CSV template file, Save it (don't rename it). You will leave it as a CSV file (UserImportTemplate.csv) and DO NOT change it to a spreadsheet file type (*.xls for example).
Return to the Imports page in ClassReach (the same page where you downloaded the CSV Template File - see above for directions to get there again) and click the blue Upload Button (see below). Select the CSV file and it will upload once selected.

After uploading the Upload button will change to a Replace button with a red trash can next to it and the name of the file below it. You now have the option to replace the file, delete it or go to the Next page (bottom right corner of the page).
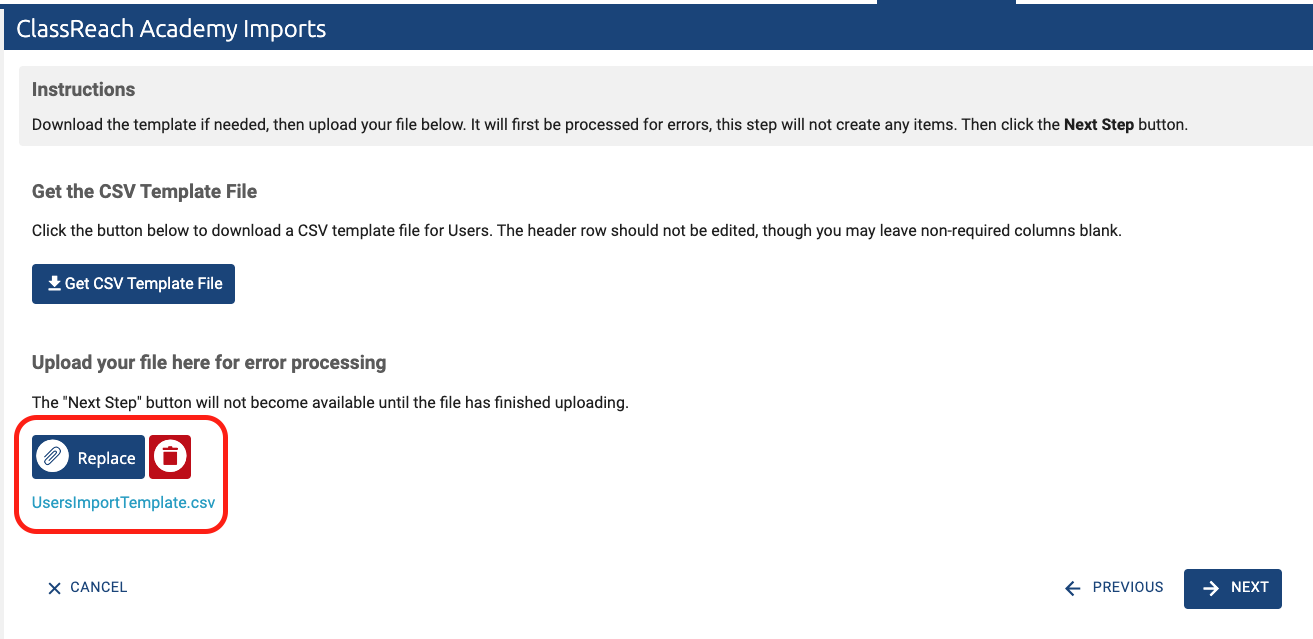
Checking your User Data for Errors and Making Corrections
On the next page you will be able to see if your data imported with/without errors. A row with an error will be highlighted red, you will see a black error banner at the top of the page and you will see a black box with a yellow triangle and text in it where the error is located. Below you can see a few examples. The first line contains no data and created an error and the second to last row has a missing last name field (which is required). In the second image, the Academic Level was entered with an invalid value.
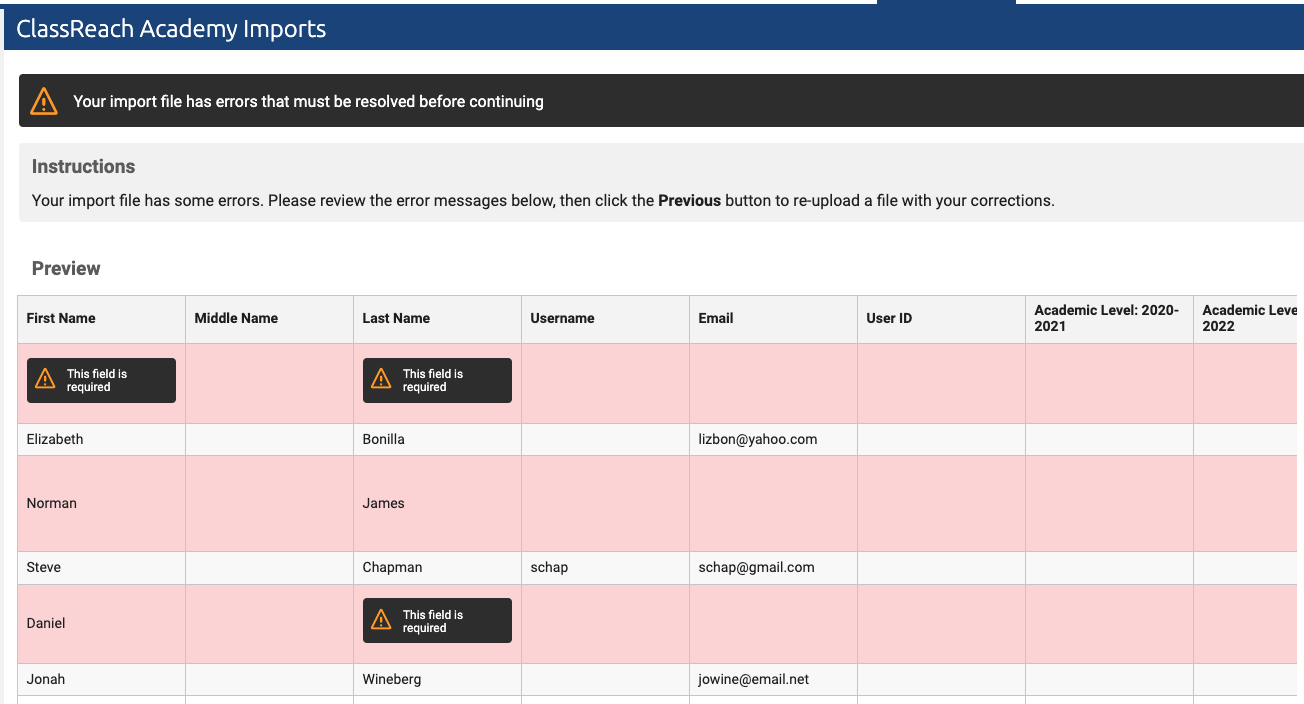

If you have errors, click back to the previous page, fix the errors in your CSV Template file, save it, replace it by uploading again and then return to the Next page to check for errors. If the errors are cleared and the upload is good the screen will look like the below image - no more black error banner at the top or red highlighted rows. Review your data in all the columns and rows and then click Save (bottom right corner) to complete the import.

Importing Courses
After you designate that you would like to import Courses on the first page, you will click to the next page and download the CSV Template file for Courses.
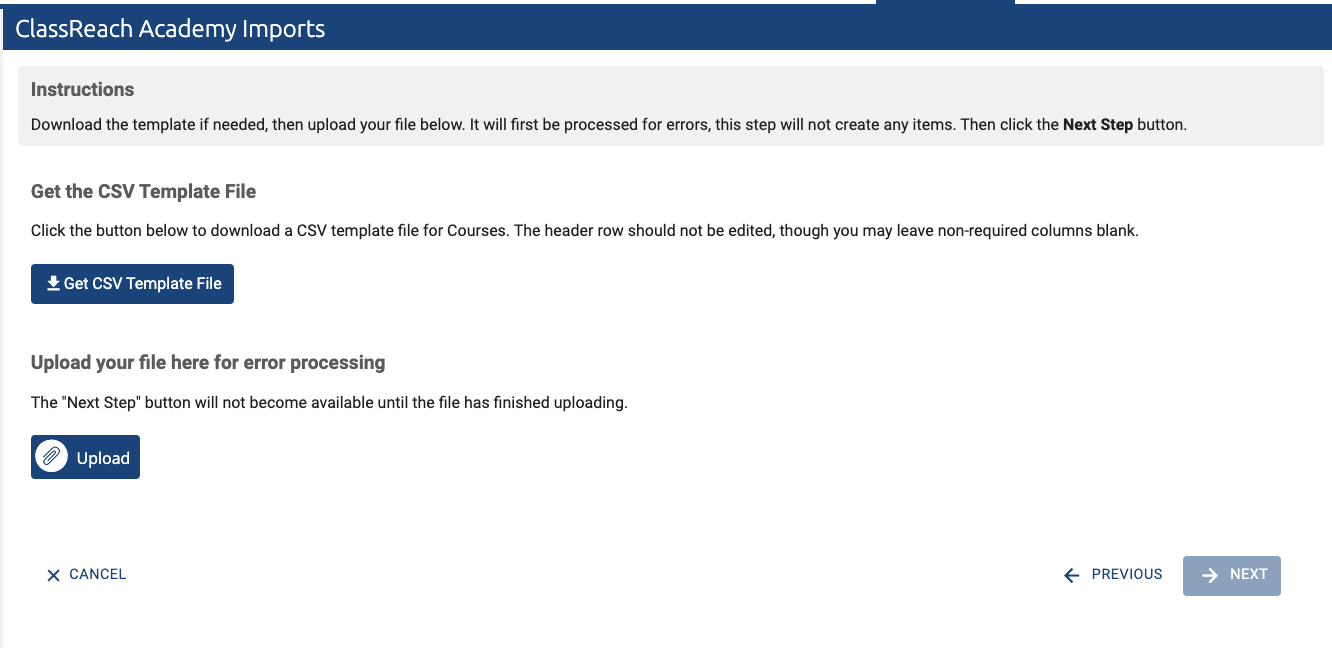
The Courses CSV Template file is set up just like the User CSV Template file (see above for a detailed description)

At this point the process is exactly the same as the User Import. Enter the data in the CSV Template File and Upload the file when complete. After upload you will click Next and Review and check the data for errors before saving the data.
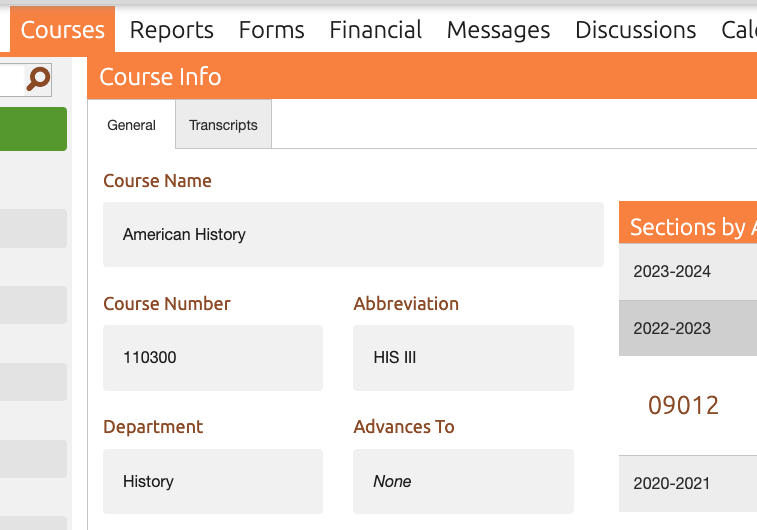
Course Import requires a Course Name, Course Number, Department and Subject Abbreviation for each course. You will need to set up options for Departments in the Settings before you use the Import - click here for details. These fields correlate to fields in the Courses page in the below image. The Course Numbering scheme and abbreviations are unique to your school and up to your discretion. They can both include letters and/or numbers. Courses are not tied at all to a specific school year. Sections, under Courses, are tied to a school year and Academic Term. For more information on Courses and Sections see this article - Creating/Editing Courses.
References:
Hoffman, S. (2022, October 28). What is a CSV File and How do I Open It. How to Geek. https://www.howtogeek.com/348960/what-is-a-csv-file-and-how-do-i-open-it/