Adding Charges to Individual Accounts
Adding charges to your customer's accounts can be done in two ways. 1) Individually by customer via the Financial Customer page which this article will cover and 2) By batch using the Transaction Batches on your Financial Summary page.
Important Note: To access your school's Financial Suite, you must be either be designated a Super Admin or have been granted “View and Edit” permissions for Financial Permissions. If neither of these apply to you, you must contact someone in your school with Super Admin privileges.
One important aspect which applies to all pages of the financial suite is the School Year drop-down in the upper right of every page. Be sure to select the appropriate school year when viewing or editing any information on that page!
Adding a Charge to an Individual Customer:
There are two ways to navigate to a customer's Financial page to Add a Charge. The easiest is through the Financial Summary page, and then select the family you would like to add a charge for.

Once you are on the family's main page, the Customer page, you can select the green Add Charge button.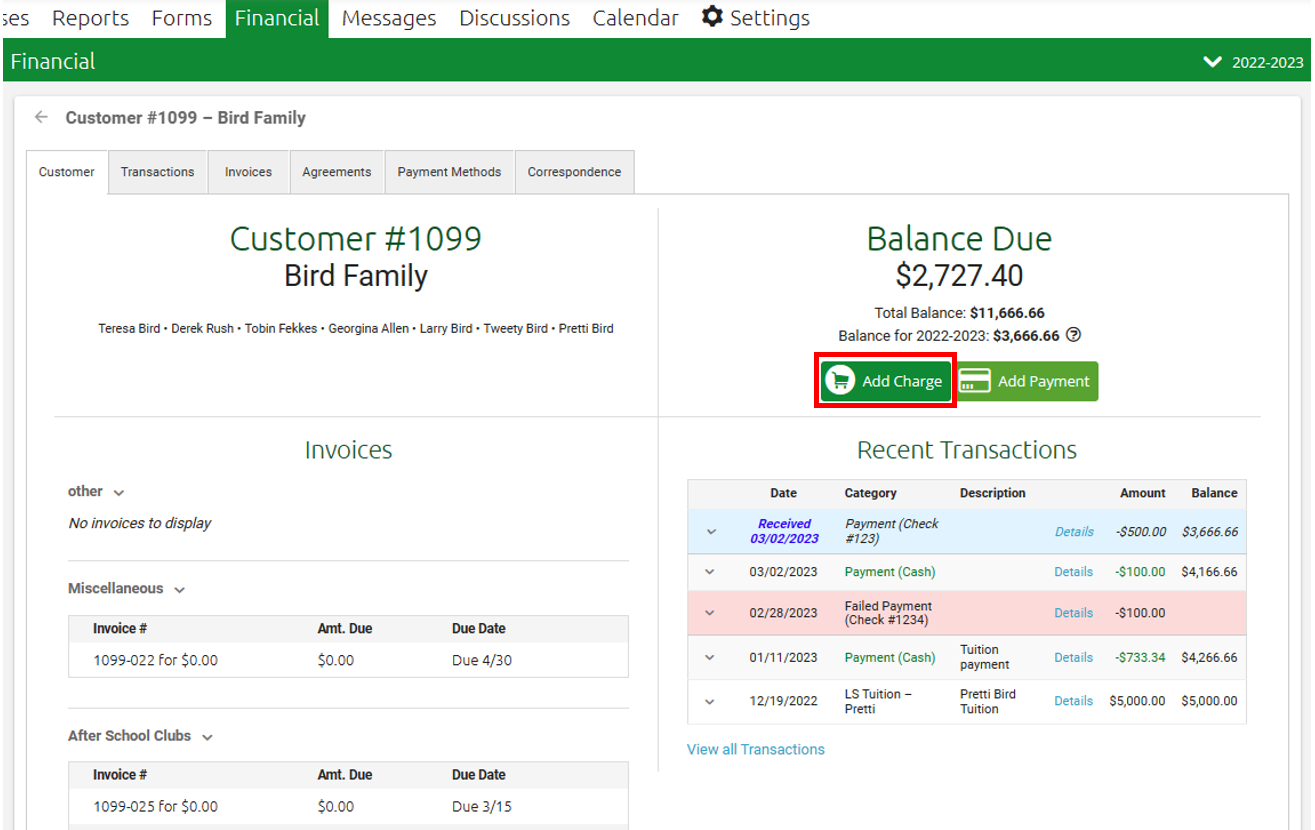
The Add Charge button will bring up a New Charge entry window where you can fill out the details of the charge being added: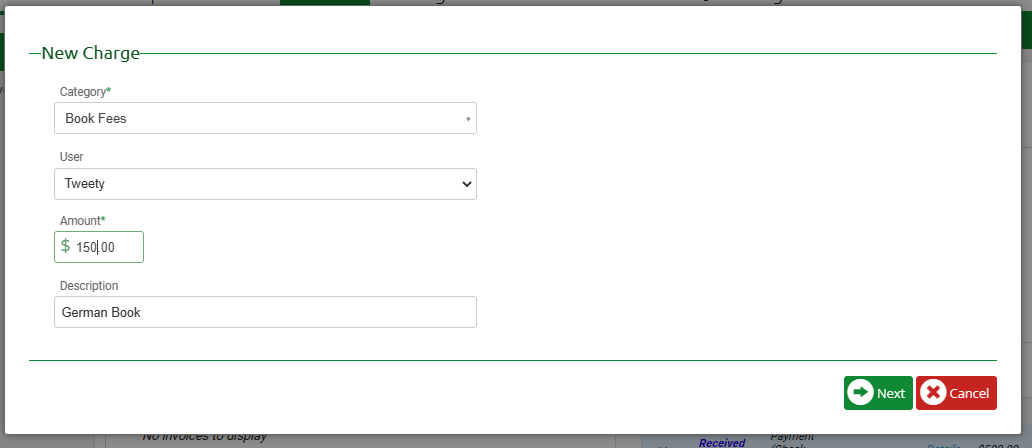
Category: required - drop-down list is pre-populated from the list of Financial Accounts for the Financial year you are working within. Select one.
User: optional - select the user from the drop-down list (populated from the list of students in that family).
Amount: required - enter the amount of the charge.
Description: optional - enter a description of the charge if desired
Select the green Next button;
How next window behaves depends on the Category you chose for the charge and whether that account/category has payment plans.
- The first example will be a charge for a category with no payment plans:
 Click on the INVOICE NOW button; and you will be given the option to Invoice Later or add a new invoice now.
Select the Add new invoice check box and fill in the desired invoice date and click the green Save button.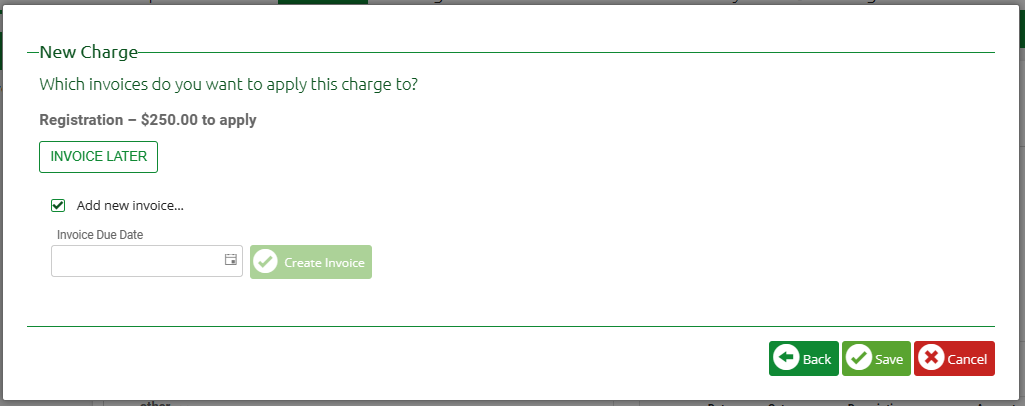
Note: sometimes you may be prompted to split a charge across multiple invoices, however this is not required. Simply click on the green Create Invoice button and then Save:

- The second example is the behavior when the charge is for an account/category WITH payment plans. You can see it is offering the three invoice options to apply the charge to. You can select one or multiple.
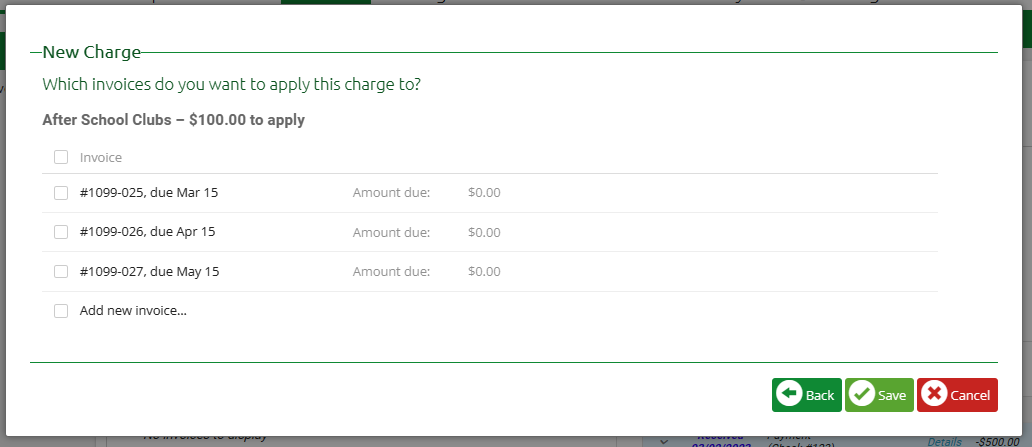
Each time you select another invoice, it evenly splits the amount of the charge: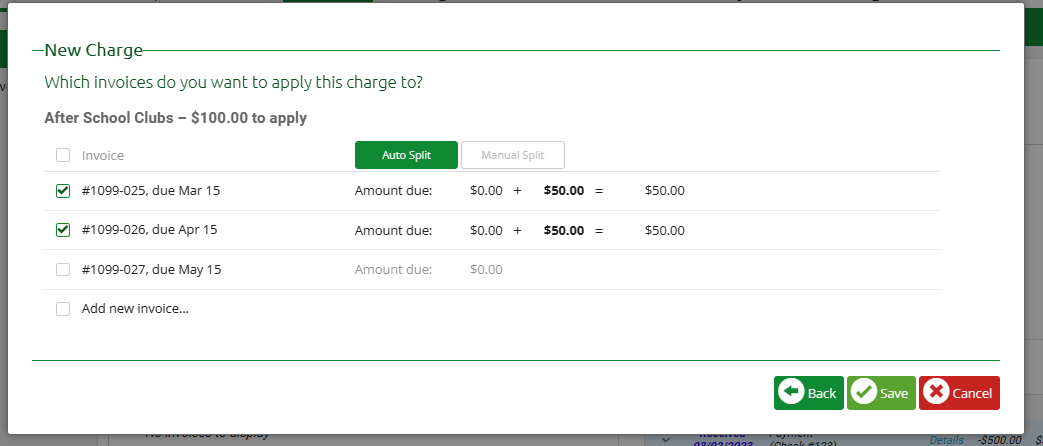
Click the green Save button. See below to see how the 2 charges display on the customer's transaction history: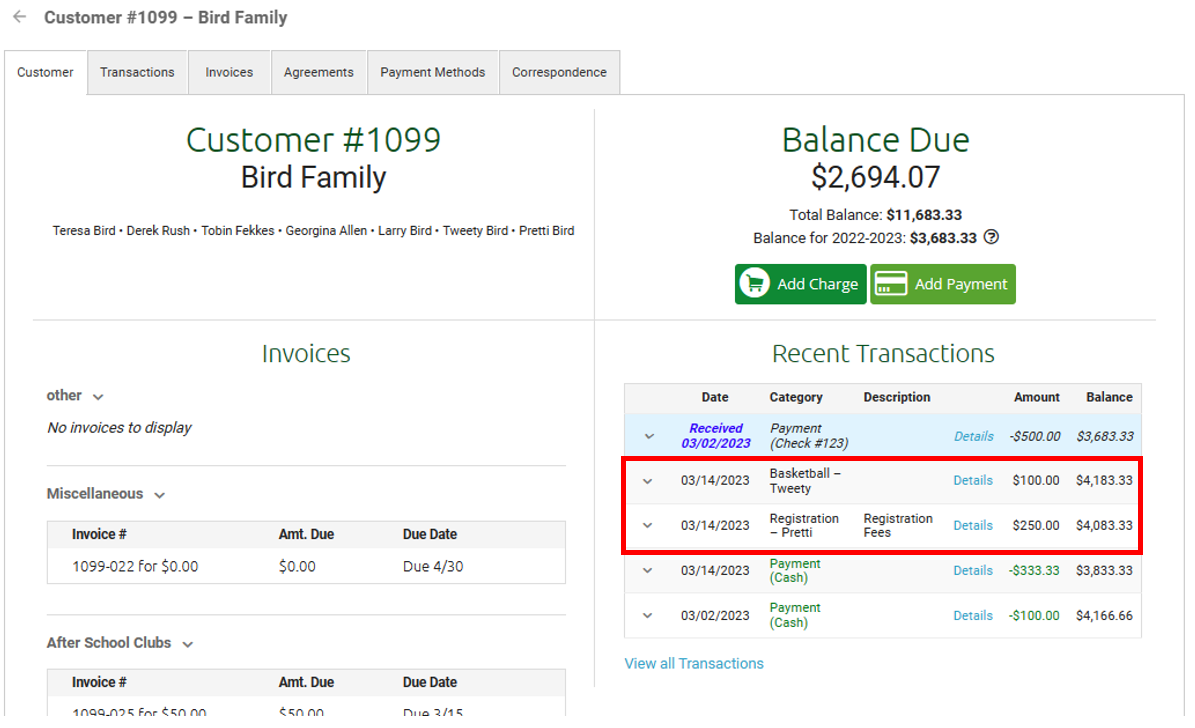
Related Documentation
Adding Charges via Transaction Batches
Financial Accounts and Categories