Transcripts - Putting it all together
This article outlines how to put together a high quality transcript using ClassReach's many customizable options and settings.
There are several inputs to creating a good transcript and when successfully set up, ClassReach produces an impressive picture of your students' achievements. This article outlines the customizable features that allow you to produce a comprehensive transcript for your students.
CONTENTS
- Transcripts Overview
- Course data for the Transcript
- Transfer data for the Transcript
- Customizing the User Info Form for the Transcript
- Transcript Settings
- GPA and GPA Scales
Transcripts Overview
Transcripts are a type of Report. There are actually two default type Transcript Reports available on the Reports page.
- Transcripts: To view a full record of a student's courses taken and credit earned, you will want to use this report type.
- Unit Transcripts: This report expands the Transcript report by allowing you to select several more options including dividing up the school year to see the grades for each Grading Unit (which should correspond to each reporting period).
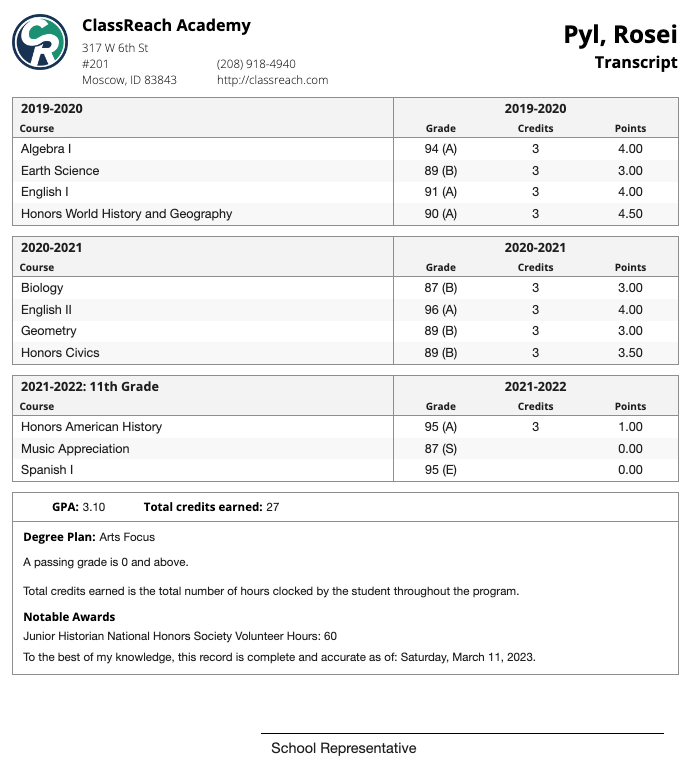
The Transcript has 3 main sections - a header, the body and a footer.
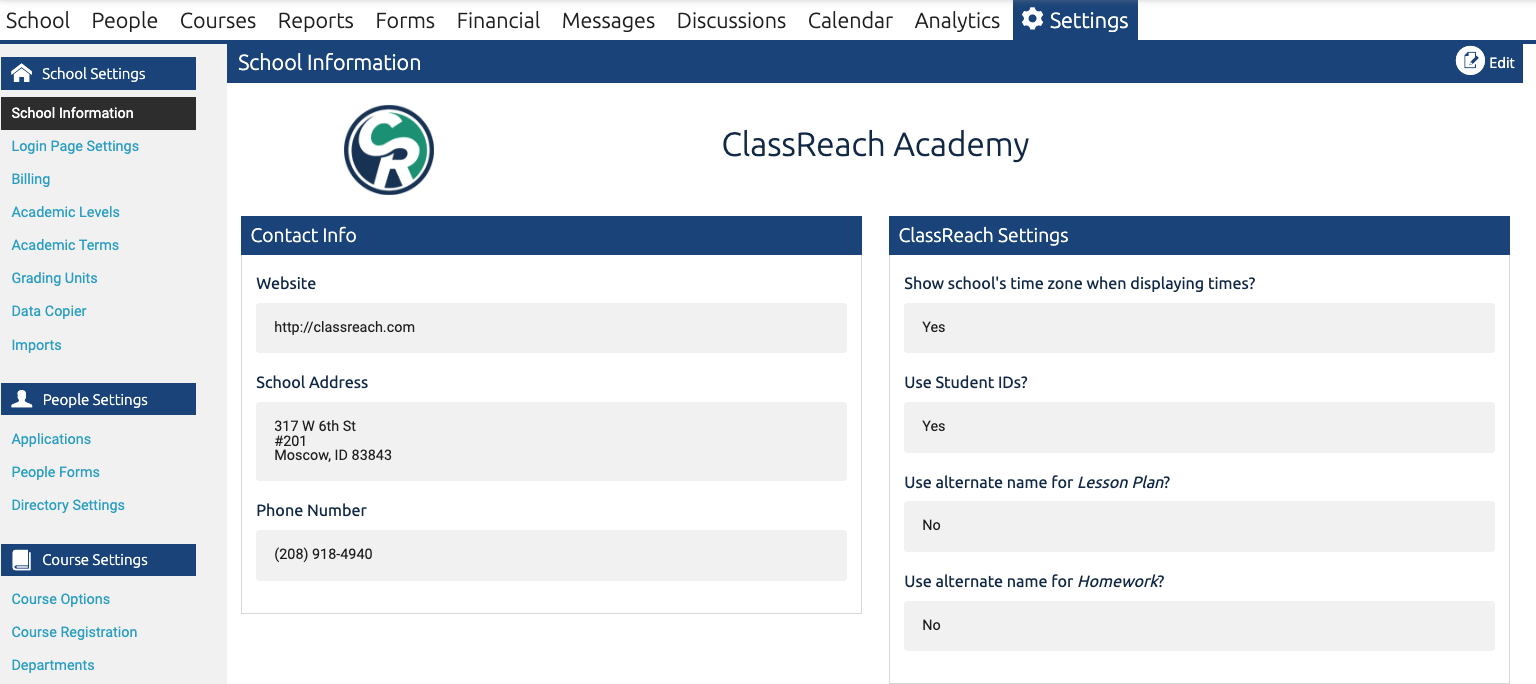
- The Header - this section consists of the school name, address, phone number and website. This information comes from the School Information Settings page.
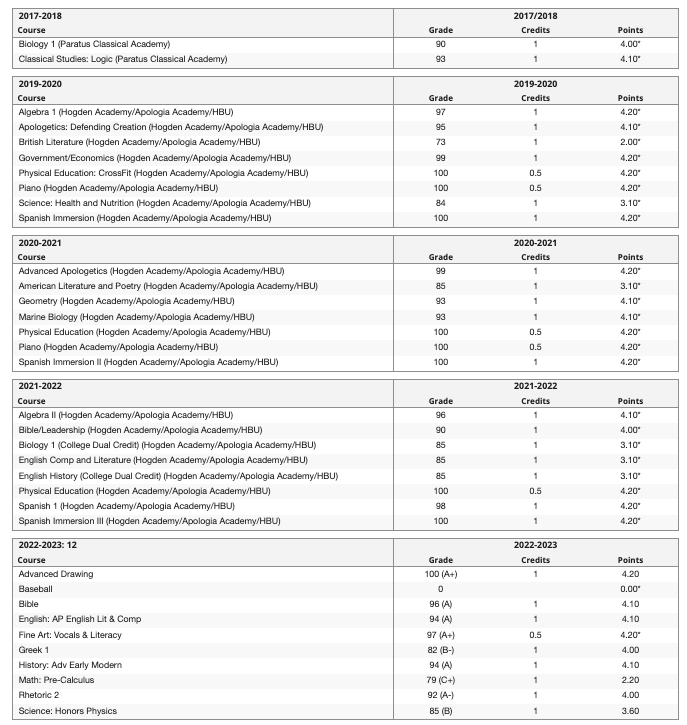
- The Body of a transcript comes from Courses in ClassReach and any credits the student transferred in from another school via the Transfer tab on their User Info Form (usually entered by an admin). Both of these will be discussed below. The courses are grouped together by Academic Year and further described by Academic Level if the student was enrolled in your school and you were using ClassReach for that year. In the example below, this student transferred in all the courses prior to 12th grade. Notice the 2022-2023 school year is labeled differently as "2022-2023: 12" and that previous years include the prior school in parentheses after the course name (this is optional).
- The Footer - this is the customizable section of the transcript.
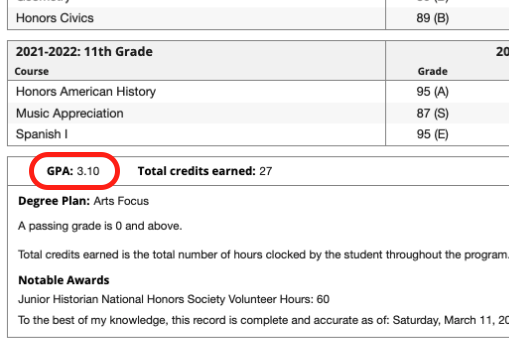
- The student's GPA and Total Credits Earned.
- The footer text is made up of 6 parts - 3 that can't be moved or edited and 3 that can be edited in the following order, top to bottom:
- "*This course does not affect the student's overall GPA" - Not moveable or editable
- Footer Text from the User Info Form - student-specific, shows if data is entered
- "A passing grade is xx and above." - Not moveable or editable. The passing grade is the lowest percentage in the GPA scale that receives points.
- Transcript Footer Text from Settings > Transcript Settings - shows on all transcripts
- Footer: Bottom Text from the User Info Form - student-specific, shows if data is entered
- "To the best of my knowledge...." statement - Not moveable or editable
- You customize the footer text in two places - the User Info Form and Settings > Transcript Settings. Both are described in detail below.

Course data for the Transcript
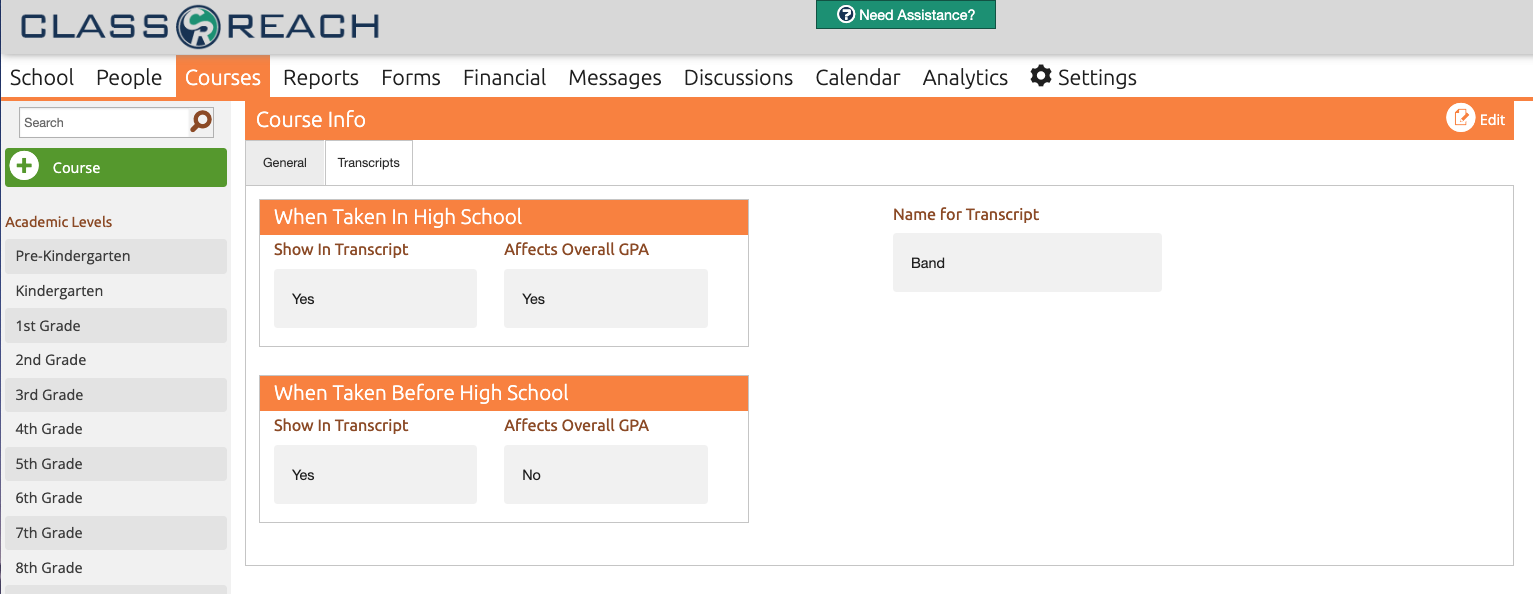
Every course in ClassReach has a Transcript tab where the admin can indicate whether the Course is included in the transcript. Also, each course has the option on the General tab to assign the number of credits the course is worth (this impacts the transcript).
Transfer data for the Transcript
The data for transfer courses is entered on the student's People > Transfer tab.

If you click the "Edit" button pictured above, you will see the basic view which allows you to enter each Course Name, Numeric Grade, Letter Grade, Credits and School. The Numeric Grade is required and should be in the 60, 70, 80, 90, 100 range and correspond to any letter grades entered.
Click the link for "Advanced GPA Options..." to enter Transcript information.

NOTE: Courses are entered in the Transcript tab by Academic Term. You must have the Academic Terms specified in the School Settings prior to adding Transfer courses.

The above expanded view (visible by clicking "Advanced GPA Option") gives you the following options:
- Transcript Checkbox - Include the course on the Transcript
- Affects GPA Checkbox - The Numeric Grade and Credits are included in GPA Calculations
- Custom Mark - Select one of the options set in the Transcript Settings
- GPA Type - lists Course Options in order to select a GPA Scale that applies to this Course
- IMPORTANT: This section will show ALL Course Options that you have created for your school, but only the GPA Type applies in this situation.
- See the below GPA Section or the article Creating/Editing GPA Scales
- Custom GPA - this field is used to enter a specific GPA from another school.
Custom GPA is a hard-coded number and will override ClassReach's built-in GPA calculations (see below GPA section) for this Course (meaning it will not use the Numeric Grade and Credits to calculate). The overall GPA will calculate correctly if you use a Custom GPA. However, the Custom GPA value SHOULD NOT be used in conjunction with the Transcript Report's Unweighted GPA Option.
- Unweighted GPA WILL NOT CALCULATE CORRECTLY with a Custom GPA value.
Customizing the User Info Form for the Transcript
The Footer of the Transcript may be customized by fields entered on the User Info Form. This may include such things as Class Rank, Student Awards and Honors, Graduation Data, Endorsements and/or Diploma Plan.
Class Rank Settings: On the Settings page, you have the option of entering customized Class Rank Settings such as weighting class rank by course credit or excluding courses that don't affect GPA. The Class Rank Settings are used for a Default Class Rank Report. These Settings do not connect or export to the Transcript. If you want to include Class Rank on the transcript, you may pull the Class Rank Report and then manually enter the Class Rank on the User Info Form for the student (see example below).
The User Info Form may be set up to include Transcript information for Students. On the Advanced tab, each field has the option for selecting Footer or Footer:Bottom (see the image at the top of this article in the Footer description).
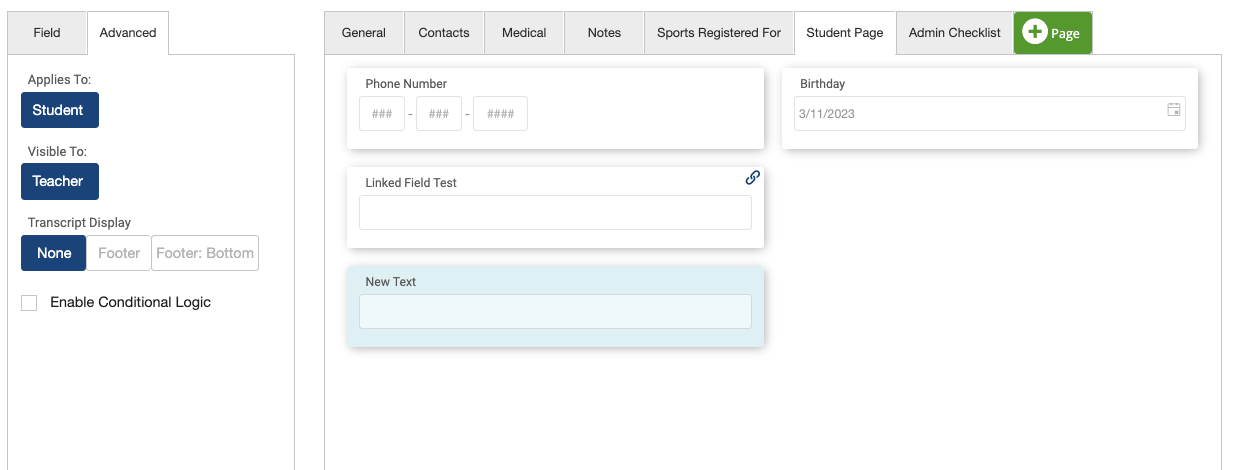
An example implementation looks like this:
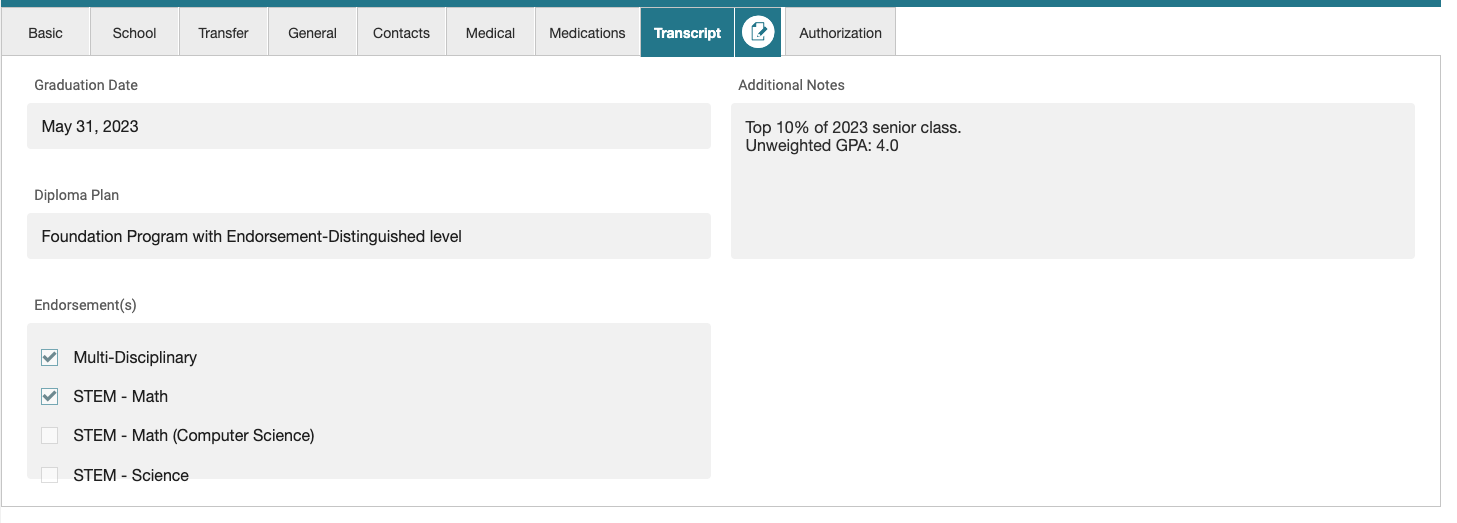
See the example transcript above to see how this appears on a transcript.
Transcript Settings
The Transcript Settings section on the Settings page allows the admin to set several parameters for the transcript as seen below.
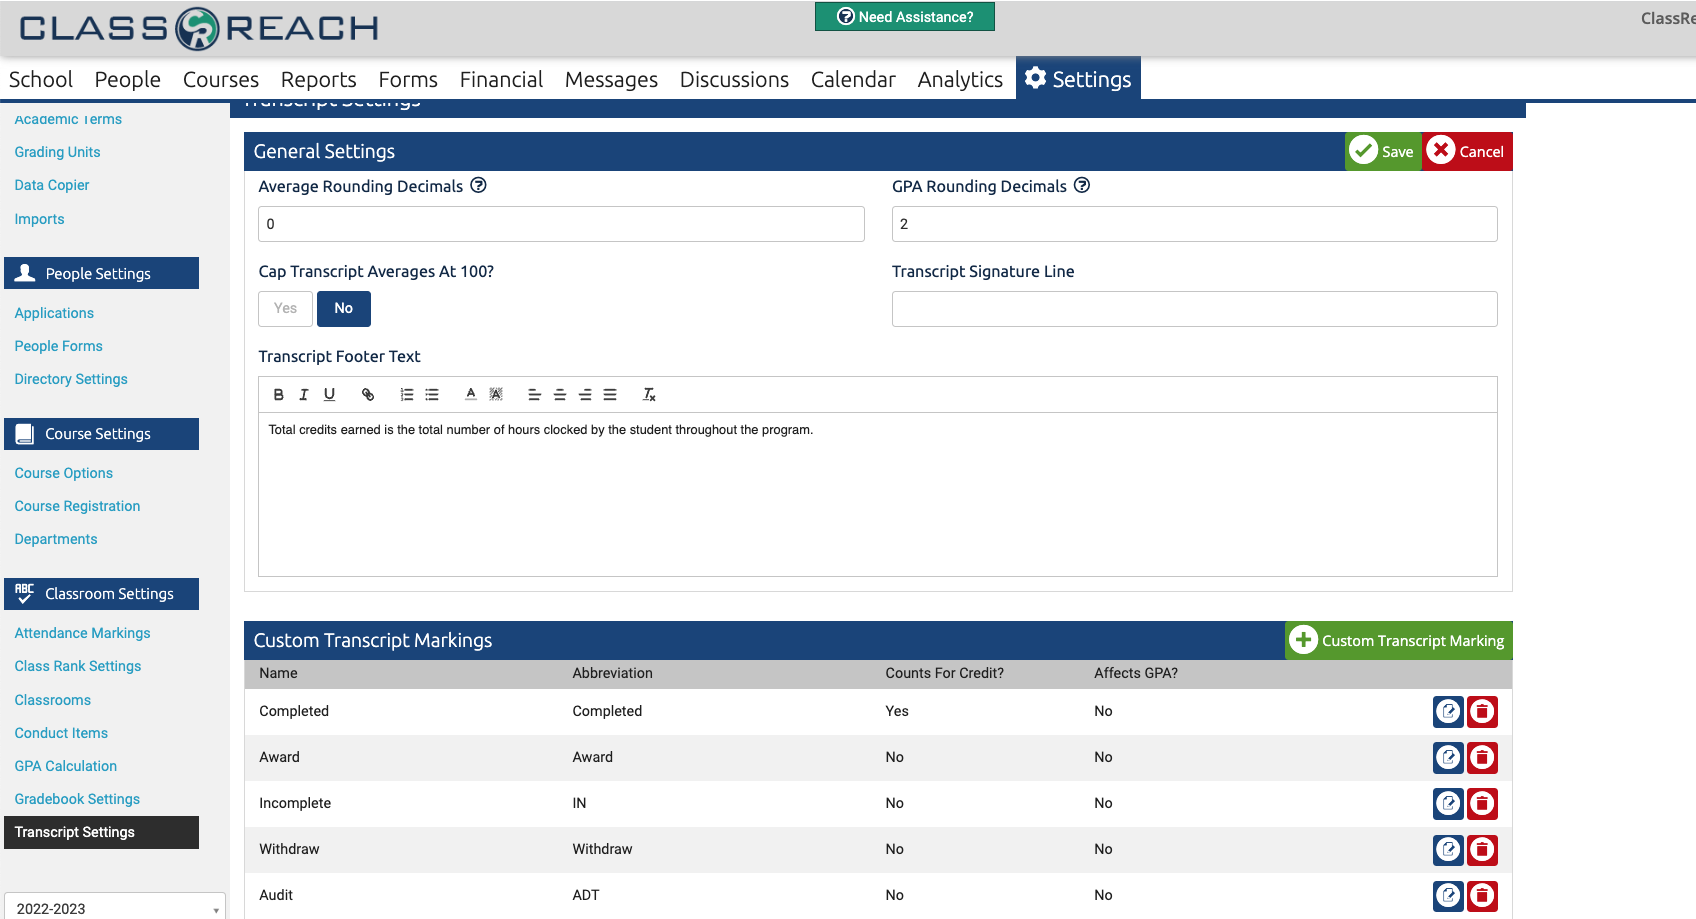
Of particular importance is GPA Rounding Decimals. This setting determines the precision of the overall GPA printed at the bottom of the transcript. If the system calculates a 3.68966 GPA, this setting how many decimal places are displayed. If you select "0" decimal places it will display the GPA as "4." If you select "1" decimal place it will display "3.7." If you select "2" it will display "3.69." High school GPAs are typically rounded to 1 or 2 decimal places.
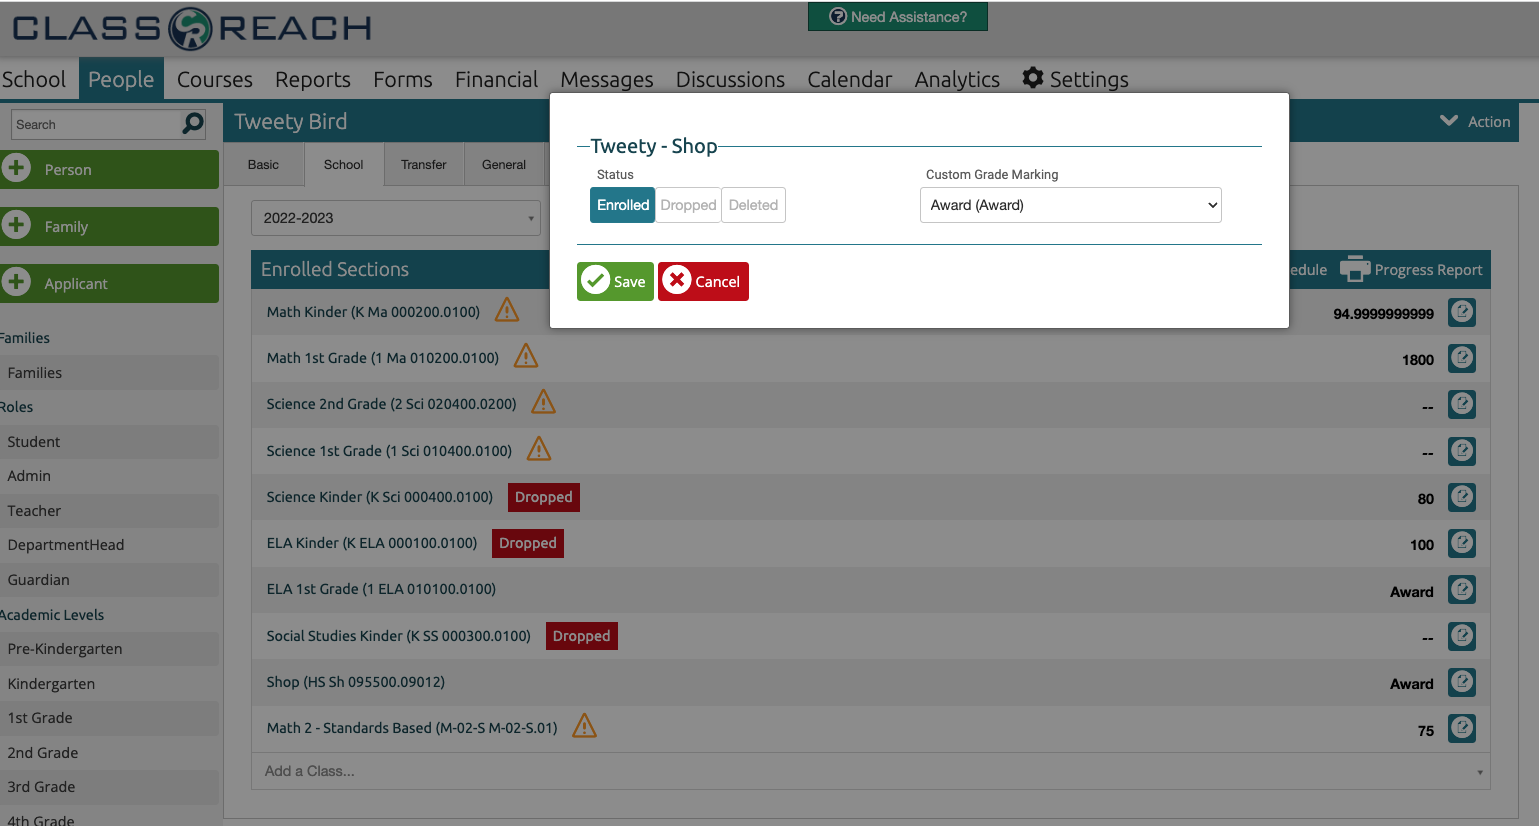
The Custom Transcript Markings may be used for various circumstances such as Withdrawal, No Grade or Completed. These would override the normal grade a student receives in a course for the purposes of the transcript. This is entered on the Student's People page, School tab by clicking the edit button next to their grade as seen below:
GPA and GPA Scales
GPA is determined based on your school's individual criteria, but you should take in to consideration the need to be consistent with other high schools around the country as GPA is a very important part of the transcript. The overall GPA displayed at the bottom of the transcript is calculated as a weighted average of every course in 9th - 12th grade.
Each course has three columns of data presented on the transcript.
1) Grades - the percentage grade for each course (displayed with 0 to 5 decimal points)
2) Credits - this definition varies by state and school district. Here for purposes of an example, 1.0 credit is awarded for a full year class completion and 0.5 credits would be awarded for a one-semester class. We also used an example at the beginning of the article where 3 credits were given for a full year class completion, which is not common. As long as your numbering scheme is consistent in your school the GPA will calculate correctly. The credits are the weighted portion of the GPA. A 1.0 credit class is weighed twice what a 0.5 class is weighed when calculating the GPA. If 3 credits were used for a full year class, then you should use 1.5 credits for a semester class.
3) Points - As described below, points come from the school's GPA Calculation settings. The most common GPA scale is the four-point grade scale. In this scale, the letter grade ‘A’ equals four points, the letter grade ‘B’ equals three points, the letter grade ‘C’ equals two points, the letter grade ‘D’ equals one point, and the letter grade ‘F’ equals zero points.
The GPA Calculation section of the School Settings page lets admins set the scale(s). Here you have the standard 4.0 scale described in the last paragraph and you may also add an additional GPA Scale for Honors or AP classes that are on a 5 point scale such that students taking those classes could end up with a GPA greater than 4.0. This is often referred to by colleges as a "Weighted GPA."
If you would like to set up different scales (for instance, an AP course on a five point scale), it takes two steps - setting up the Course Options first and then setting up the GPA Calculations. See the Creating/Editing GPA Scales article for details.
The overall GPA represents the weighted average number of grade points a student earns for each graded high school course. Multiply the credits of each course by the Points to get the weighted value of each course. Add up those weighted values and divide by the total number of credits earned (listed next to the GPA) to get the student's GPA.
NOTE: Courses in which a student does not receive a grade, such as pass/fail and audited courses, do not factor into the GPA calculation. These could be listed on the transcript, but select "No" to "Affects Overall GPA" on the Course Transcript options - see here.
Unweighted GPA
When producing the Transcript Report (via the Reports page), you now have the option to select "Show Unweighted GPA."

In recent years, colleges have begun asking for an Unweighted GPA which strips off extra points given to Honors and AP-type courses above a 4.0 scale. The max of the unweighted GPA should be a 4.0.
Unweighted GPA is calculated by applying the "default" GPA Scale from the Settings > GPA Calculations page for every Course grade on the transcript.

If your Unweighted GPA is above a 4.0, this means the maximum points available in your "default" GPA Scale are above a 4.0. Consider adjusting the default scale.
See the Transfer section above for an explanation of why the. Unweighted GPA WILL NOT CALCULATE CORRECTLY with a Custom GPA value used on one or more transfer courses.
Courses in the current academic term are NOT included in the calculations for GPA (both grades and credits) and will show on the transcript as "In Progress."