Course Registration Part 2 - Creating/Editing Offered Courses
In order to create Offered Courses you must first set up at least one Course Registration Process and then you can start creating your Offered Course groups.
The Offered Courses tab is where you define which courses will be offered in the Course Registration for the selected Academic Term. Courses are entered into one or more Groups which help to organize your course offerings. Groups also serve to filter course offerings to selected Academic Levels which align with a specific Course Registration Process.
Offered Courses are independent of the one or more Course Registration Processes that you set up in Part 1. Offered Courses are for all Academic Levels for a given Academic Term. The courses are sorted into Groups and the Groups match up with a Course Registration Process based on Academic Level.
Create one or more groups and then drag courses from the Available Courses list into your groups to offer those courses.

Offered Courses is found on the second tab of the Course Registration Settings.
Settings page > Course Settings > Course Registration
To Create a New Group
The creation order of the groups matters. The order you create them determines the order they are offered to the guardians/students. You can't re-order them after they're created.
- From the Course Registration settings page, select the academic term in the upper right corner.
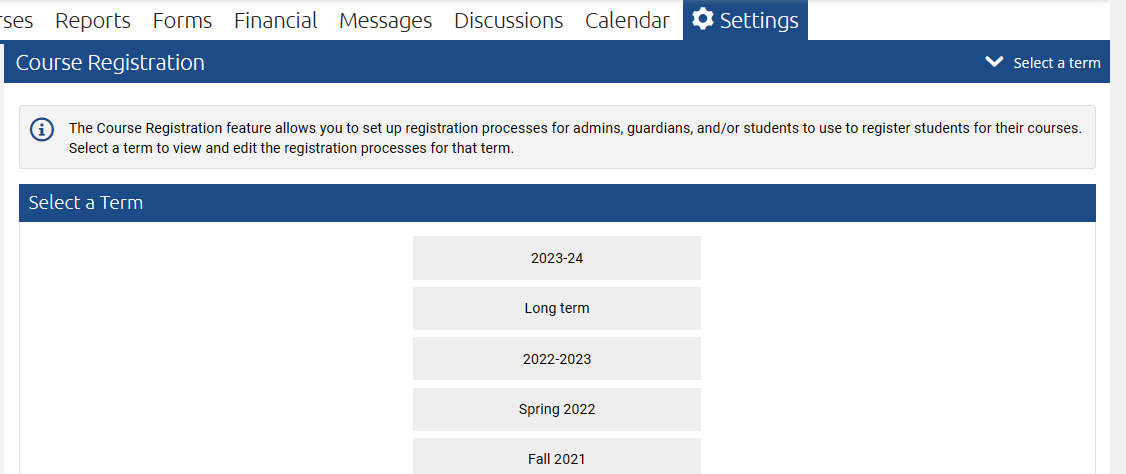
- Click the Offered Courses tab
- Click the +Group green button at the top right

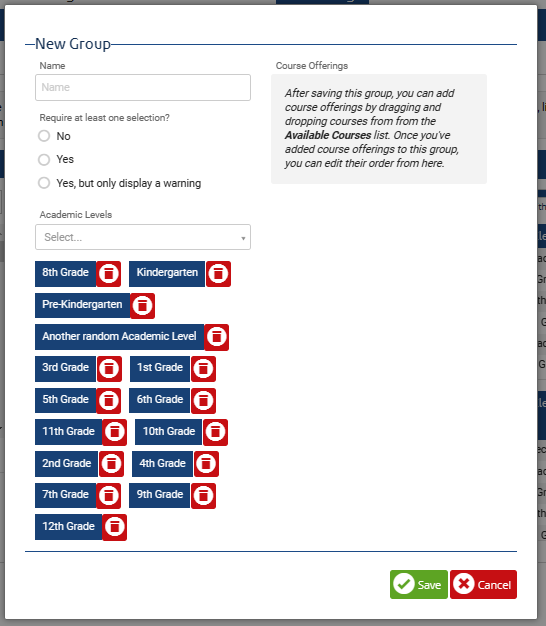
- Fill out the relevant fields:
-
- Name: This will be the name of the group, for example: Math.
- Require at least one selection? This will mandate if a selection from this group is mandatory. If a selection is mandatory, but you do not want to prevent a submission without the selection, you can choose yes, but only display a warning.
- Academic Levels: This filters visibility of the group by academic level and matches the group with a specific Course Registration Process. During registration, this group will only show to selected Academic Level students.
- Once all relative fields are filled out, click Save.
The Academic Level Selector Bar
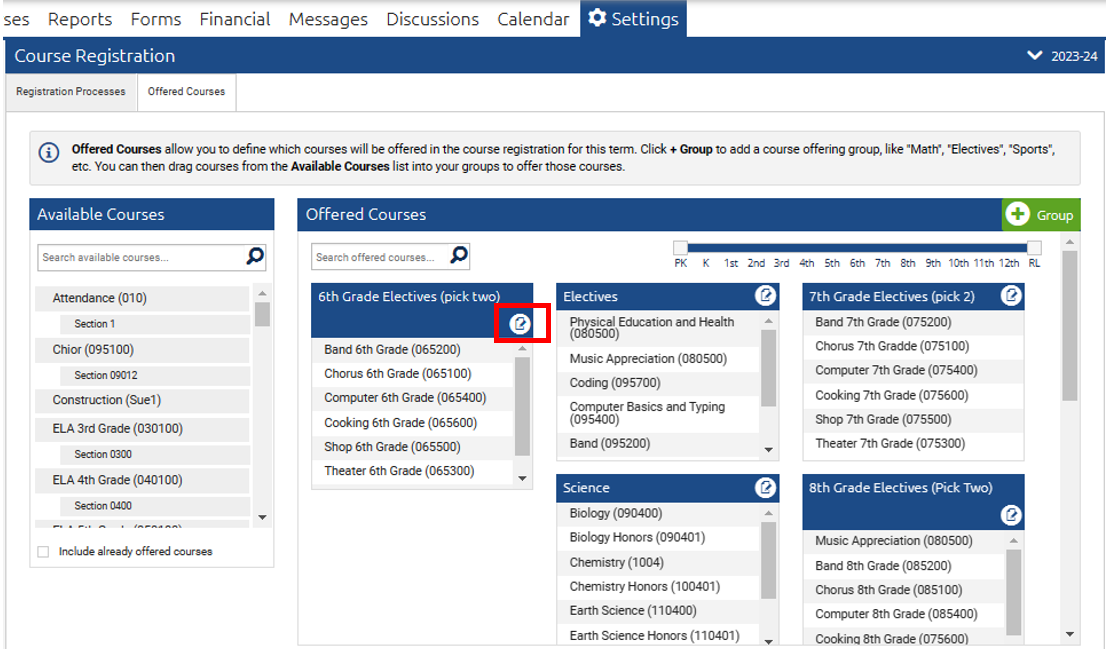
If you have a large number of groups (the example below has fourteen), you can use the selector bar to filter down to a smaller number of groups by filtering the Academic Levels. This helps to facilitate adding courses to groups. In the example below it has been filtered down to six groups by selecting only 9-12th grade.

To Edit a Current Group
- Click the Edit icon in the window of the group you would like to edit.
- Edit the group as desired.
- Rename the group
- Re-order course offerings
- Delete a course offering
- Add/Delete Academic Levels
- Delete the entire group
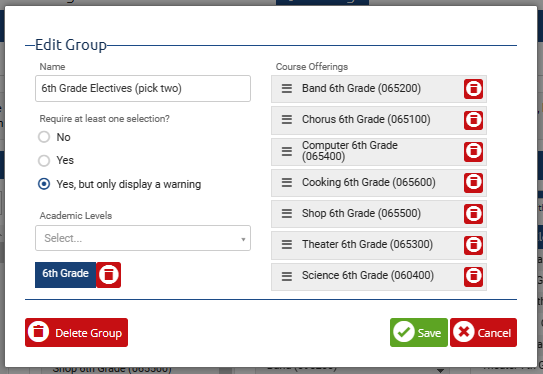
- Click Save
To Fill the Offered Course Groups
You can add Courses and specific Sections to the Groups:
Courses - If there is only one option for a course OR you want the admin to select the sections and best fit a student's schedule options (this is an admin step after the Course Registration has been submitted), then we recommend using Courses in your Groups.
Sections - If students are allowed to choose which specific section they want (Algebra, 1st Period with Mrs Smith or Algebra, 2nd Period with Mr Jones) OR you want to allow students to see the details of Teacher, Period and Capacity then you should use Sections.
If you use specific Sections in your Groups, the Guardian/Student will see details:

If you use Courses in your Groups, they will only see the Course Name:

- We recommend that you create all the groups first, in the desired order and then add courses to each group. You can use the Academic Level Selector Bar, described above, to help facilitate adding courses.
- Click and hold the Course you would like to add to a group, drag it over to the desired group, and the Group will turn green when it registers.
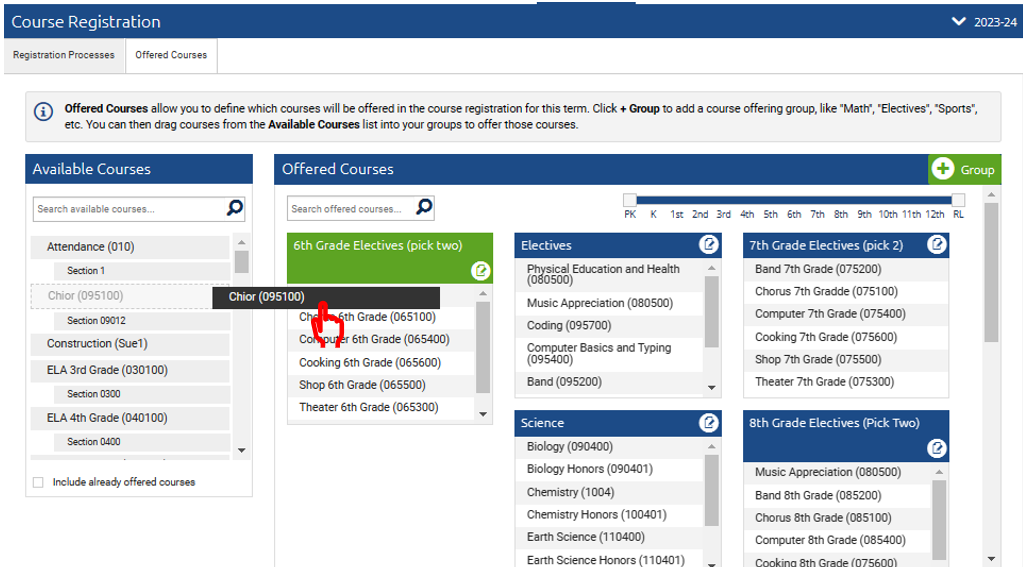
- Release the mouse and the Course will drop into the Group.
- Repeat this process until you have all of your Courses organized the way you desire.
- This will save automatically as you drag and drop courses.
Related Documentation:
Course Registration Part 1 - Creating/Editing the Registration Process