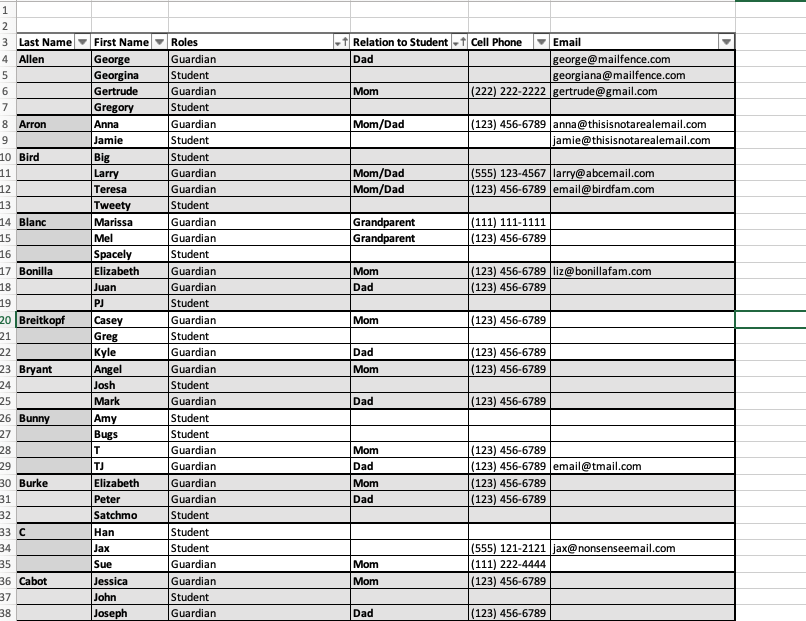
An Example Report of students that includes their parents' contact information
Guardian and Student info is available to admins easily via the People Page and then searching via Family. The Family connects the Guardians and the Students. In a Teacher's section overview page, a teacher can click on the name of a Student or Guardian to access all of their contact information.
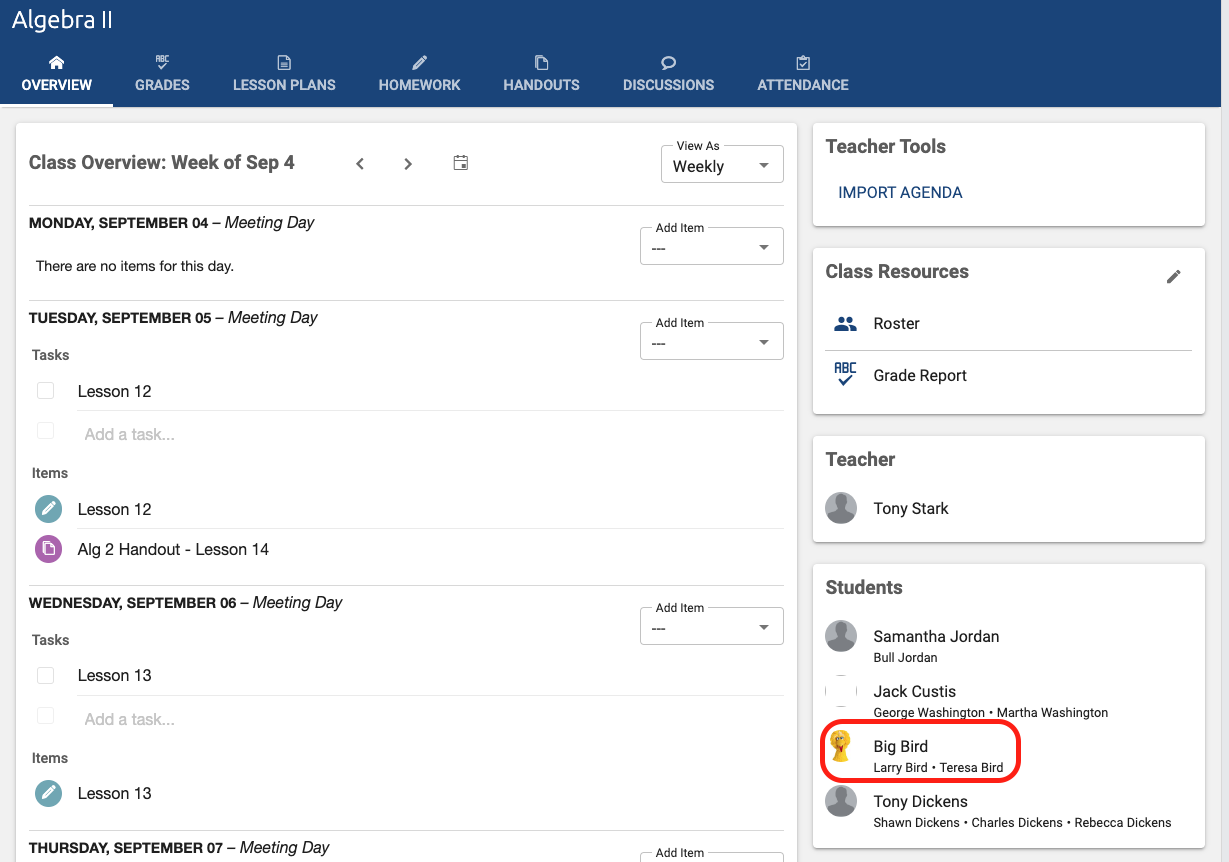
In ClassReach Forms and Reports, they are not directly connected so multiple reports should be used to pull that information together. An example use case of this would be a school office wants to have a printed roster of students with guardian contact information.
Some schools have opted to include Guardian Information on the Family/Student Contacts page. This requires the entry of some redundant data (Guardian Contact info), but it will co-locate the Guardian info with each student. If you'd like to make this modification please contact support and we can assist you.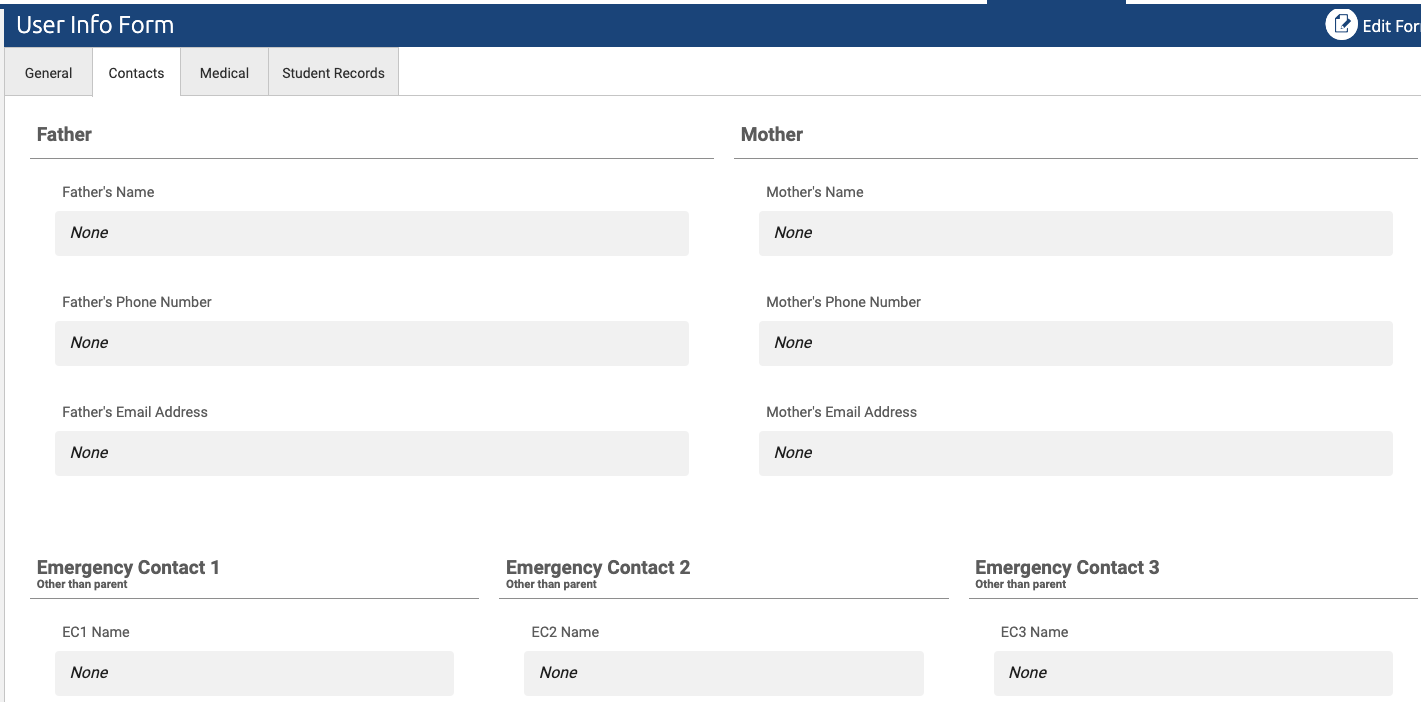
To make this example report, you will pull a USER report from ClassReach, export it to a CSV file and adjust the data using MS Excel.
This report ASSUMES that Students and Guardians have the same last name. If they do not, they won't be matched, but you can manually adjust the report output to connect them.
1) Create a new User Report with Active users in the Role of Student and Guardian. Filters are optional.
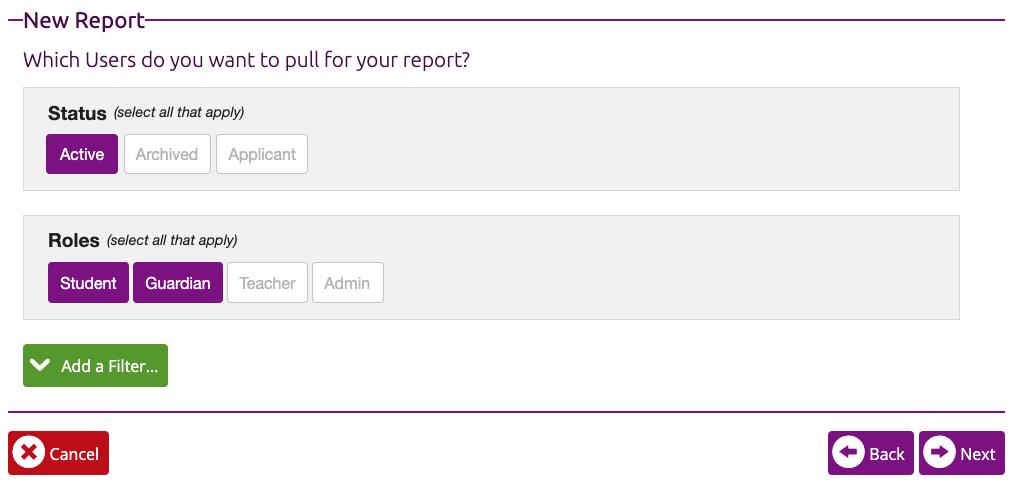
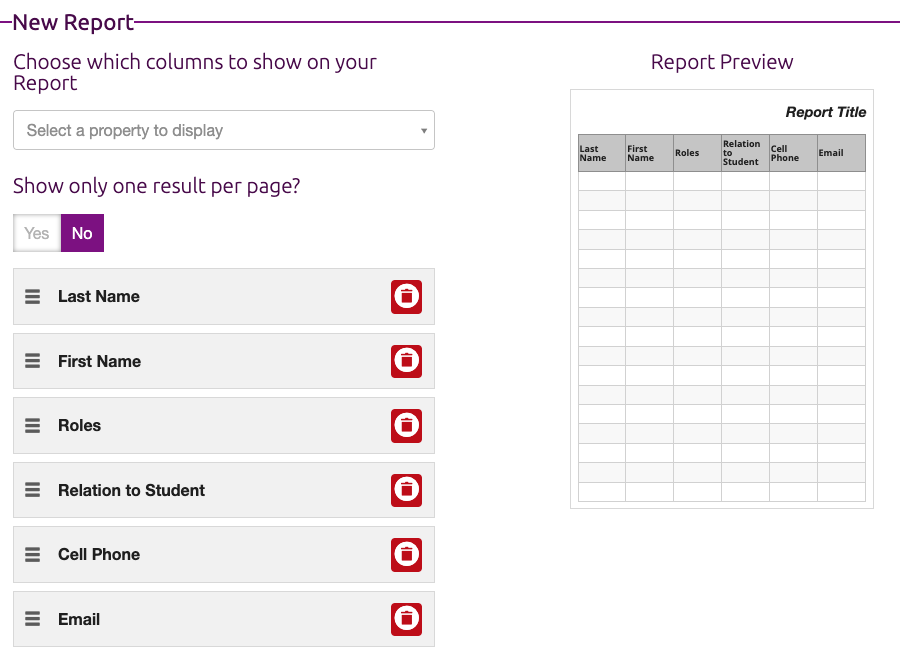
2) Choose columns for your report as desired. This is what we selected for this example -
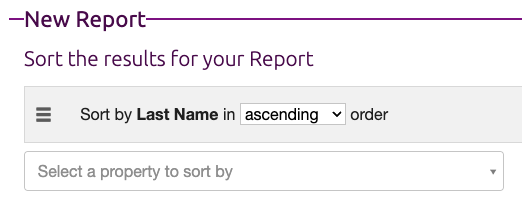
3) Sort by Last Name
4) Output to a CSV file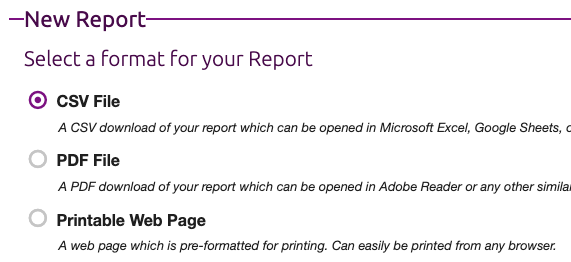
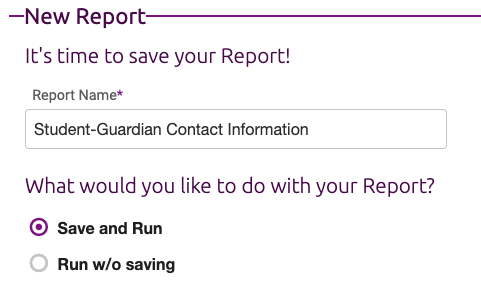
5) Name your Report, Save and Run (you will only need to set this up once).
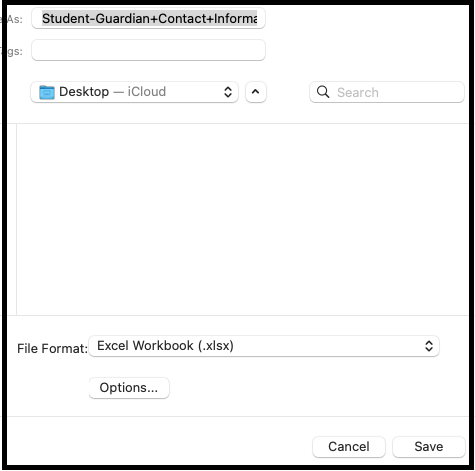
6) Save the CSV to your computer and open it in MS Excel. Do a "Save As..." in an Excel file
format.
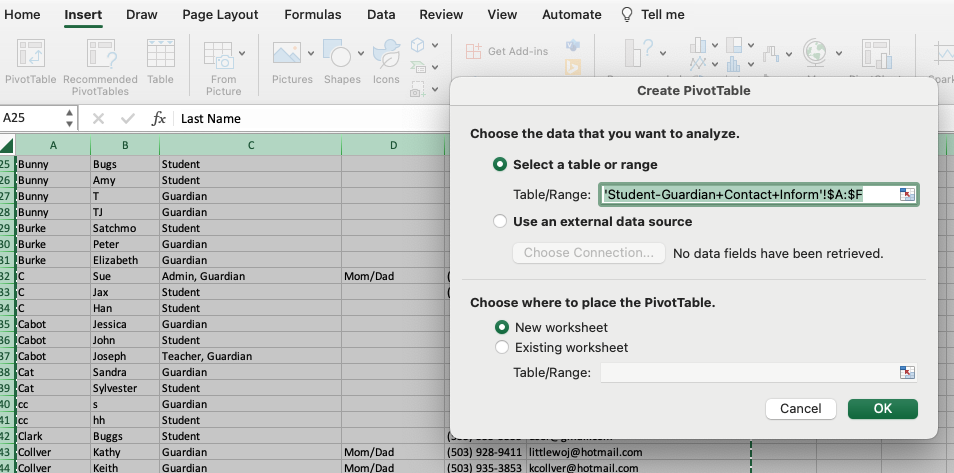
7) Insert a Pivot Table on a New Sheet
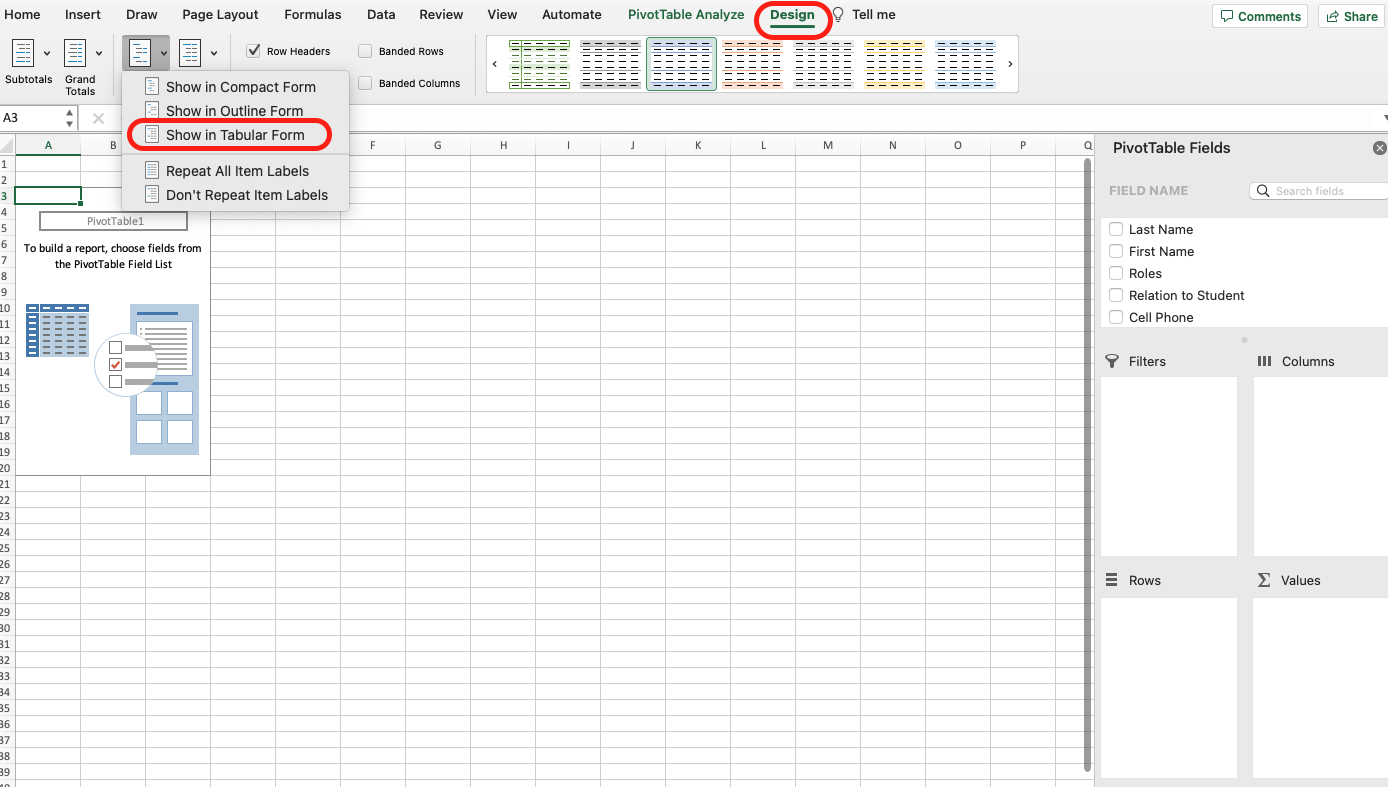
8) Select the Design page for the Pivot Table (top row). Select "Show in Tabular Form" from the "Report Layout" options button.
==
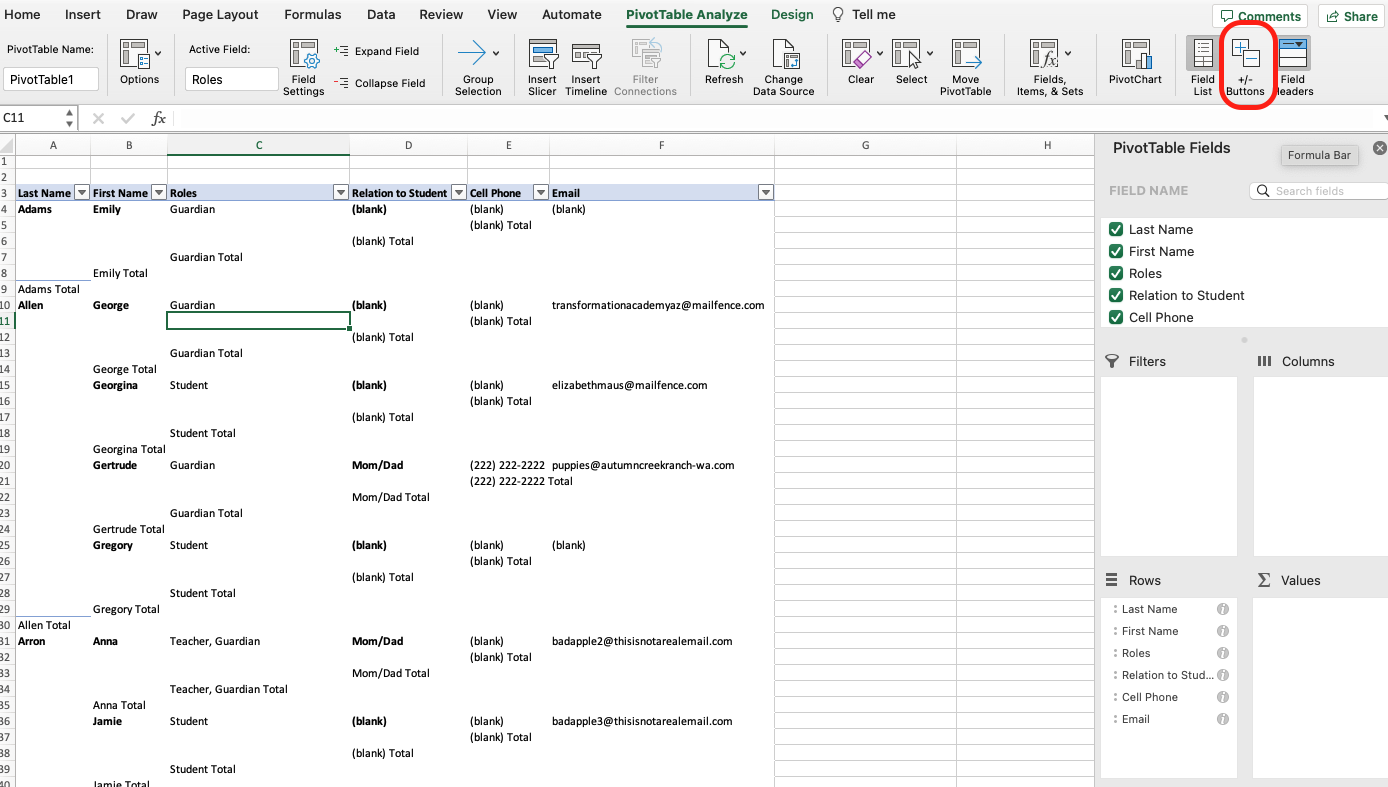
9) Go back to the Pivot Table Analyze page (next to Design) and in the PivotTable Fields List, add all the Field Names into the Rows of your Pivot Table.
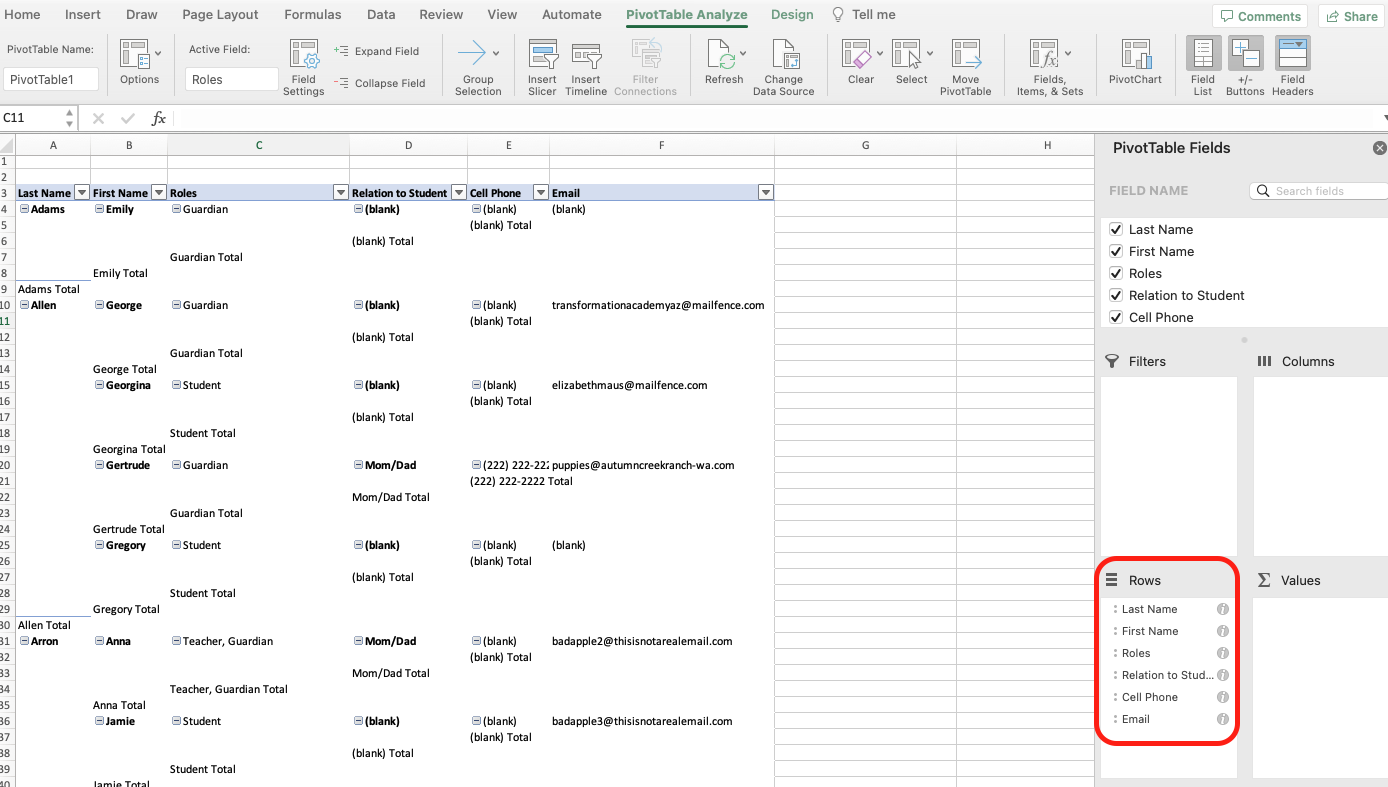
10) Click the +/- Buttons option to remove all the expand buttons from the Pivot Table.
11) Back to the Design page, click "Subtotals" and select "Don't show subtotals."
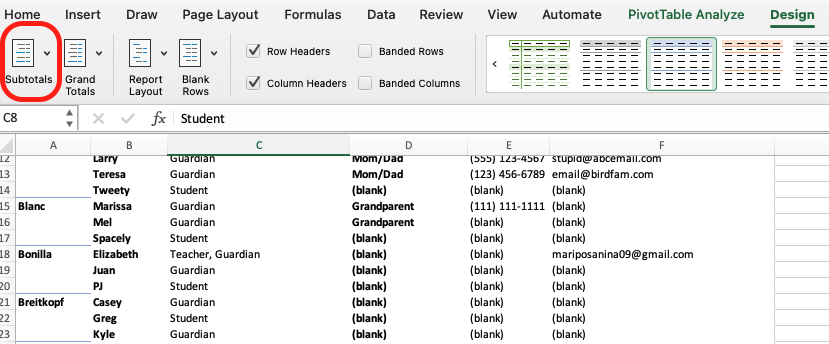
12) At this point you have a data table that is now organized by family and can be further formatted as you desire. We have replaced "(blank)" with a space and other formatting to show the families are grouped together.
