Teachers teach one or more subjects (called Courses in ClassReach). In a given Academic Term, each Course will have one or more Sections (a specific teacher and group of students that meet one specific days at a specific time). You will see your Sections on your ClassReach home page in both the Quick Access section as well as the bottom of the left sidebar.
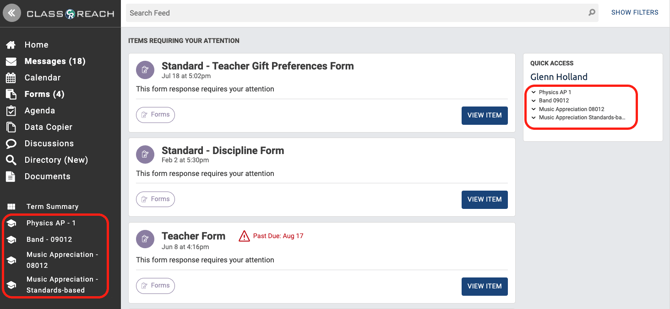
Click on a Section name and you will go to that Section's Overview page. From here, you will find and enter grades by clicking on the Grades page. The Grades page has several tabs - Gradebook, Averages, Conduct and Settings.
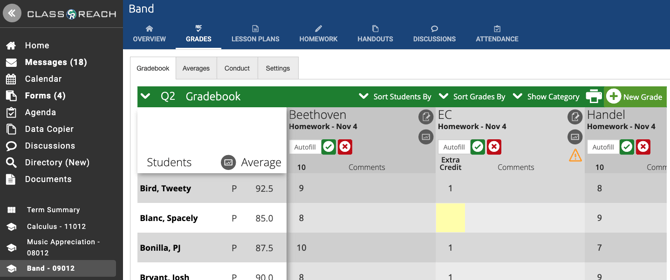
- Gradebook - Graded Items are entered and viewed here. If you use Quarters, Trimesters, Semesters to divide up your Academic Term (called Grading Units), then your Gradebook will only show you one of those units at a time (the above example is showing Q2)
- Averages - this will list students and their overall grade average for the Section along with each Grading Unit's grade (Q1, Q2, Q3, Q4 and the average)
- Conduct - teachers can add/edit Conduct Items and Comments on this tab
- Settings - teachers can view and sometimes edit gradebook settings on this tab
Gradebook Settings are often configured at the school-level by an Admin, but can be delegated as Custom so that a teacher can control the settings. If you don't see the ability to change the Settings then contact an admin for your school. Gradebook Settings are usually not changed during the school year.
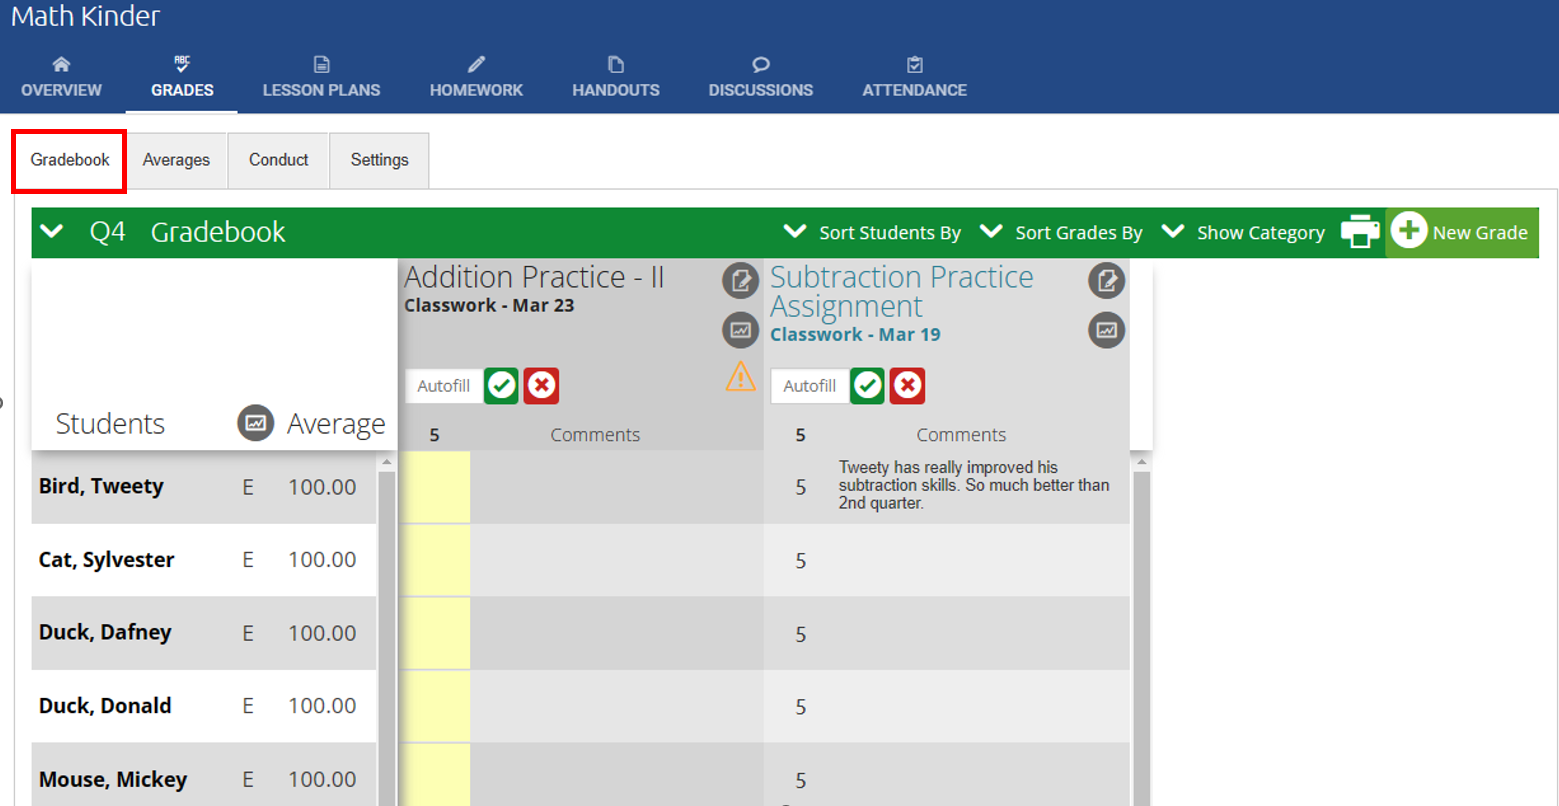
Gradebook
Students will be listed on the Gradebook tab, along with all the graded items for the current Grading Unit. Their Grading Unit (Q4 below) average is also displayed next to their name. The Graded Items can be entered here. This also includes Homework that is entered on the Homework page.
Gradebook Options - Green Header Bar
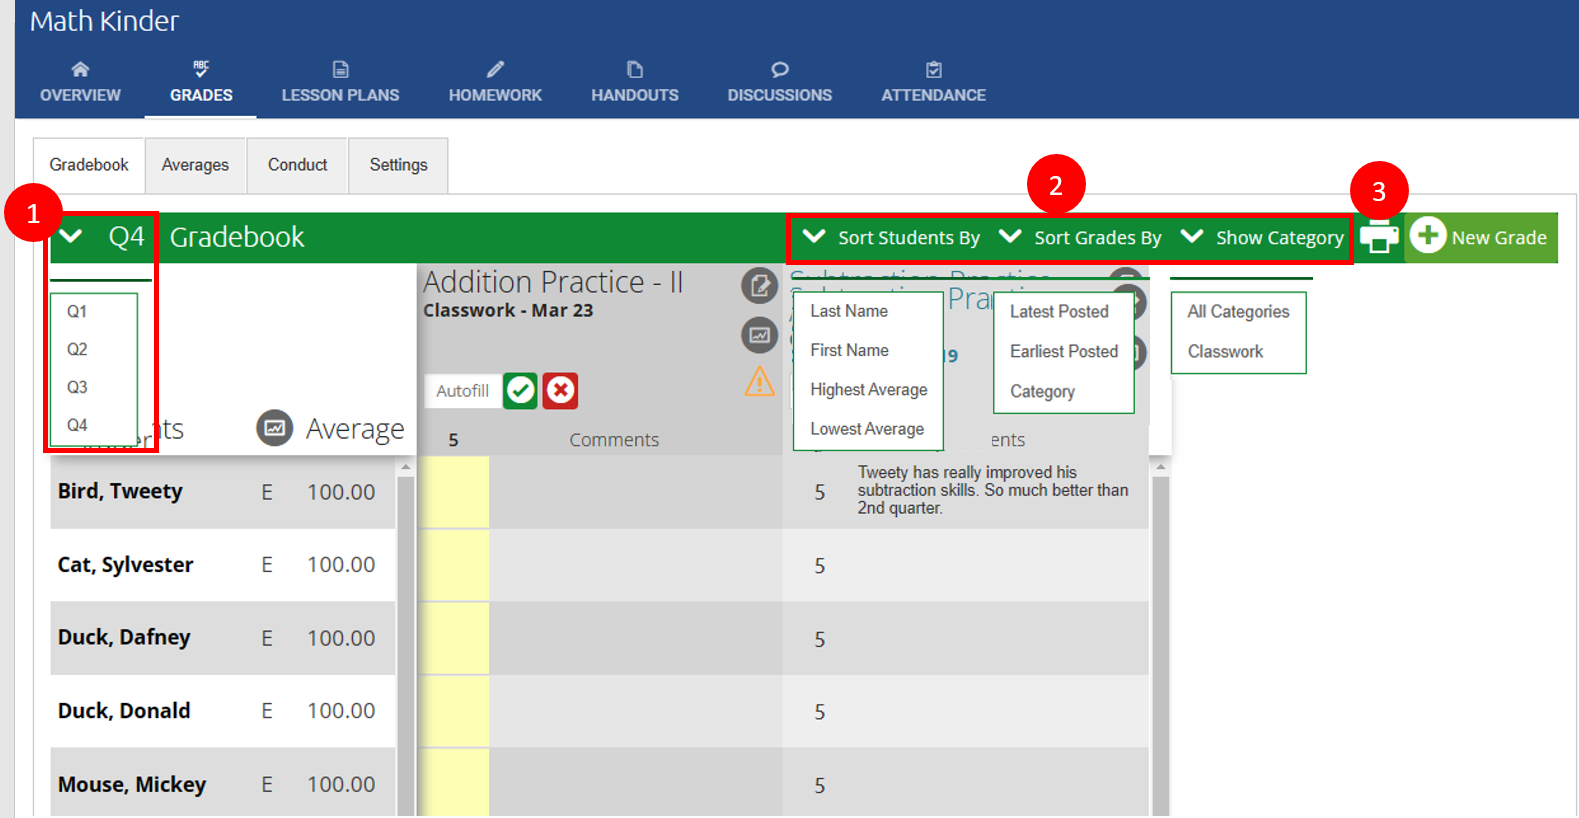
1) The Grading Unit drop-down in the green header bar will default to the current unit based on the date range set by your Administrator in Grading Unit Settings. You can select a different unit to access past grades. Note: If your school doesn't use grading units, you will not see this drop-down
2) There are several sort and display options for the Gradebook
3) Print icon - This feature is called the Printable Teacher Gradebook
and allow several configurations:
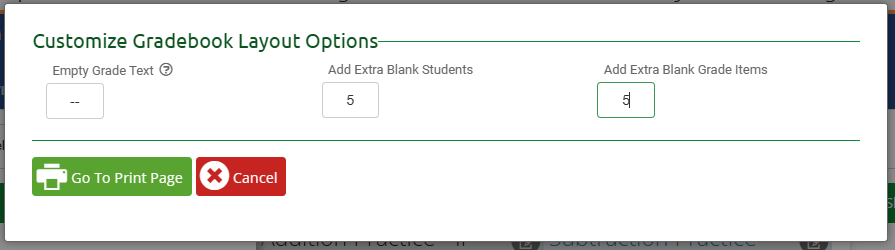
Empty Grade Text - This is where you can indicate what you want to display in existing students who have empty grades (it will not show for extra students or extra grade items)
Add Extra Blank Students - This can be useful if your roster is still filling up and you want to leave lines to fill in manually.
Add Extra Blank Grade Items - Adds additional grade slots for future entry

Next, you'll have the option to format the print page. The above example would print out as follows - note the print options selected to see the headers and grid lines:

Inputting Grades

- If the assignment you are inputting the grade for is already in the system (via homework, agenda, etc.) locate the student and correct box and enter the points earned. Once you click outside of the box, it will auto-save.
An M or <blank> will not be counted when the grades are averaged. M stands for missing. Leaving the assignment <blank> will not flag the assignment for Guardians or students. Marking an assignment as Missing with an M will turn the assignment red in the gradebook for Guardians and Students.
Important Note: ClassReach gradebooks will calculate percentages based on the Points Possible and the Points Earned.
- If the assignment you are inputting the grade for is not in the system (was an activity in class, a pop quiz, etc) click the +New Grade button at the top right of the screen.
- Fill out the relevant fields:

-
- Name: This will be the title and how it will appear in the gradebook.
- Select Grade Category: This will tell the ClassReach system the weight this grade has when calculating grade reports and transcripts.
- Hide from Students: If you are not sharing the grades with the class at this time, this will allow you to hide the grade.
- Extra Credit: Tell the ClassReach system if this is extra credit for when it is calculating grade reports and transcripts.
Important Note: Remember to put the Points Earned in the gradebook. If you are offering 5 extra points and put in the percentage (100) the system will calculate it as 100 extra points.
- Points Possible: This is the total number of point that can be earned by the assignment. (field is hidden if Extra Credit)
- Start Date: Usually people put this as the day the assignment was given.
- Additional Sections: If the assignment you are adding is relevant to another section, you can choose that here.
-
- Fill out the relevant fields:
- Once all relevant fields are complete, click Save.
- Locate the student and correct box and enter the points earned.
- Once you click outside of the box it will auto-save.
Entering grades with Autofill
Autofill allows you to populate every student's grade on a graded item with the same grade, all at once. If all the student get 5 point for Addition Practice, enter a 5 in the Autofill space and click the green check. This will give each student 5 points and you can then, if needed, adjust a student or more that didn't get a 5. Click the red x will clear all the grades for the selected graded item.
