FAQ: How do I require Autopay for everyone, but remove it for selected families?
Admins can selectively turn off the Autopay requirement as described below
Financial Page > Summary tab (left side bar) > Customers section > Select the family that you want to turn off the Auto pay requirement.
There are two scenarios to selectively turning off Autopay -
1) The family has NOT signed up for Autopay yet
2) The family HAS ALREADY signed up for Autopay
The Family has NOT signed up for Autopay yet
On their Customer tab, scroll down to the account where you want to remove the Auto Pay requirement (See the below image). You’ll see the black bar that says Auto Pay is required, but not set up yet.
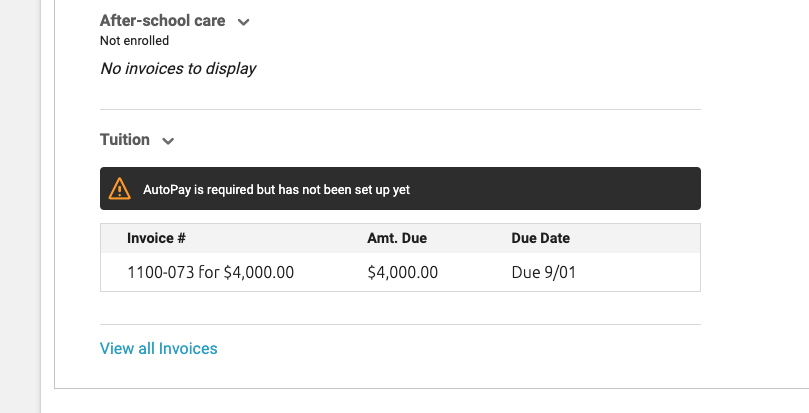
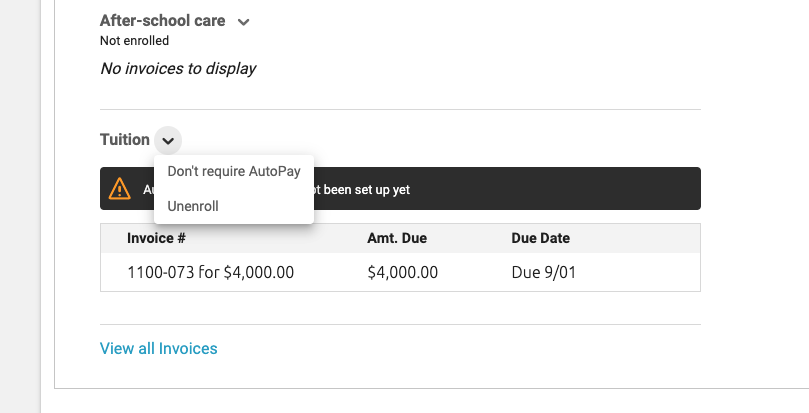
Click the down arrow next to tuition and select “Don’t require Autopay”
The family HAS ALREADY signed up for Autopay
You will see the following, “Auto Pay enabled.” This means that they’ve already set up Autopay and it requires a few extra clicks…
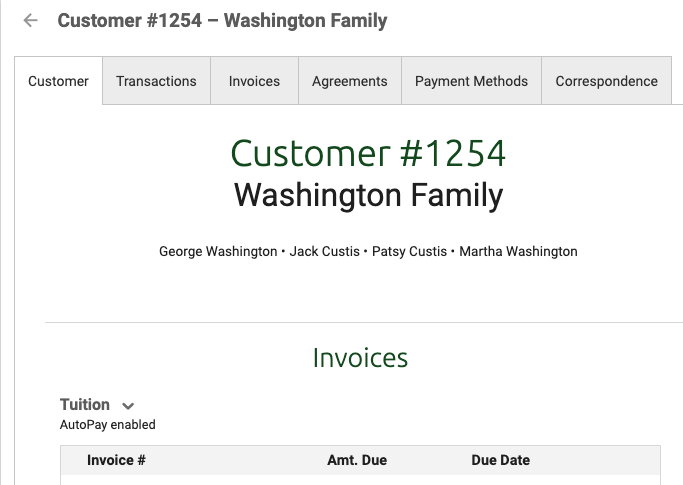
When you click the down arrow next to Tuition you will only see the option to Unenroll. So, you need to unenroll them in the Payment plan. The warning says it will delete their invoices when you do this (and it will), so take a screen shot of all the invoices in that account (you should go to the Invoices tab to do that). Then go ahead and unenroll them for that account.
Immediately go back and enroll them in that account with the same, monthly payment plan. It will create the invoice again for you. Save Payment Plan and you are done.
UNLESS…when it splits the transaction into the invoices your monthly payments are not what you desire. If that happens, complete the following:
Go to the original transaction for the Financial Agreement and click edit transaction –
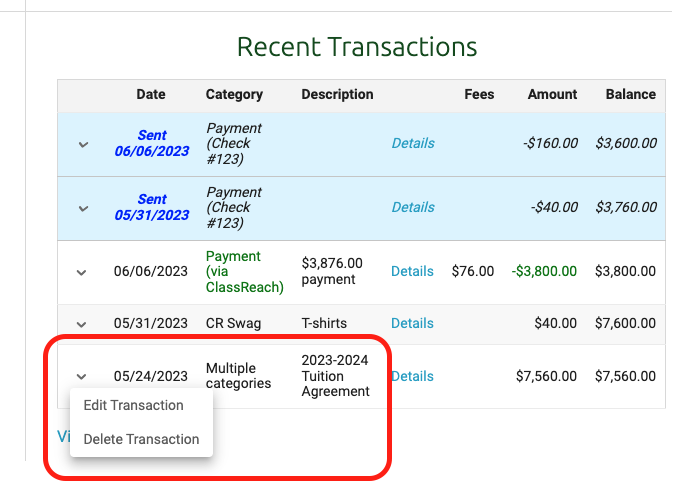
Click Next on the first Edit Charge screen (this brings you to the Edit Charge invoice screen)…
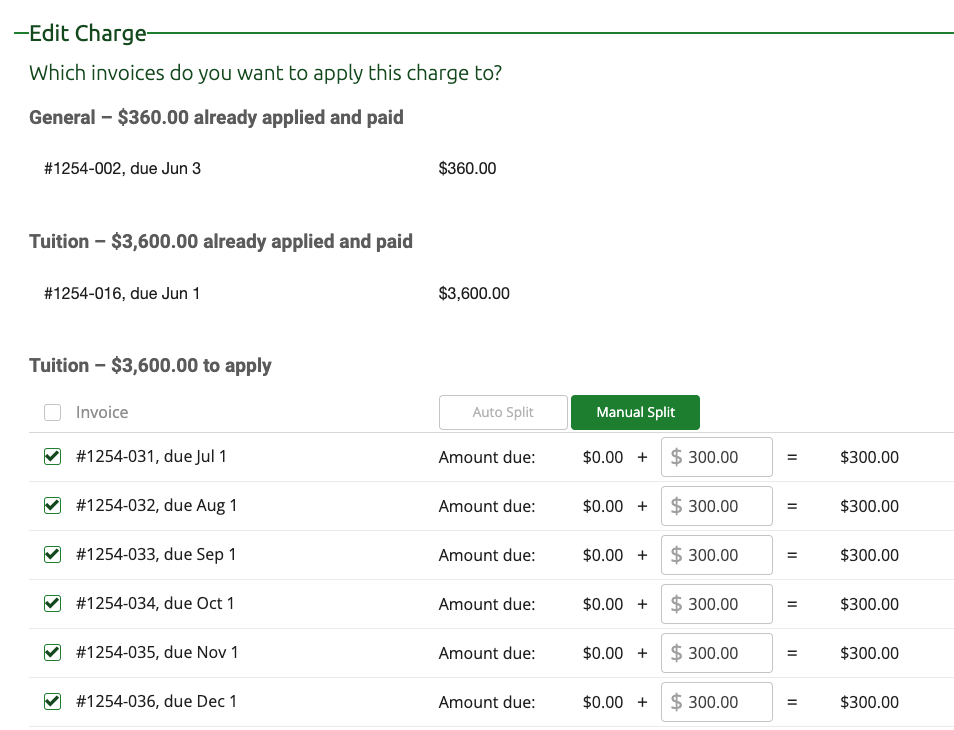
On this screen, you can manually edit each invoice amount as desired. In this example, I put them all back to $300. Then click Save and it should change them back to the amount desired.