Adding a Payment form this way can be used with both the Family Application as well as a New Student Application (when applying for a new student when the family is already attending the school). Adult schools that don’t use families in ClassReach can use this with minor modifications.
Important Note: The school is required to have Credit/Debit Cards enabled to use the payment forms. The form will not work with ACH withdrawals because until a family is a member of the school, they don’t have login access to verify an ACH account.
Credit/Debit cards cannot be limited to application payments only. Enabling those types of payments will enable them for all users in the system.
If a school would like to use a payment form and NOT ENABLE credit debit cards - they should use the option on the form which says "Customers may apply charges to a new invoice" and set it with variable due date of "XX" days after submission. This option would then give applicants the ability to mail a payment that the admin can record in ClassReach.
Here is a quick outline of the main sections of this document:
- Application Fee Payment Form
- Linking the Form into the Application Response Email
Application Fee Payment Form
To collect Application Fees as part of an Application, we recommend that you provide a link to the Application Fee Payment Form on the confirmation screen that comes up when an application is submitted to the school. This pop-up screen is only available when the user submits the form and if they don’t click the link then, they may need to contact you for another copy of the link.
This form is set up as follows:
- The purpose of the form is to “Gather Information about Families.”
- Users will create responses to this form "Through a Privately Shared Link."
- The form will be filled out by "Guardians."
- You will Collect Payments with this form
- Apply payments to the appropriate financial year (typically the next academic year which will need to be set up in Financials first).
- The default category is determined by the school, but you may want it to be separate from other school fees and tuition
- Payment Options – “Customers may pay immediately upon form submission”
- There is no due date
- Users should NOT be able to edit their responses after they’ve been submitted
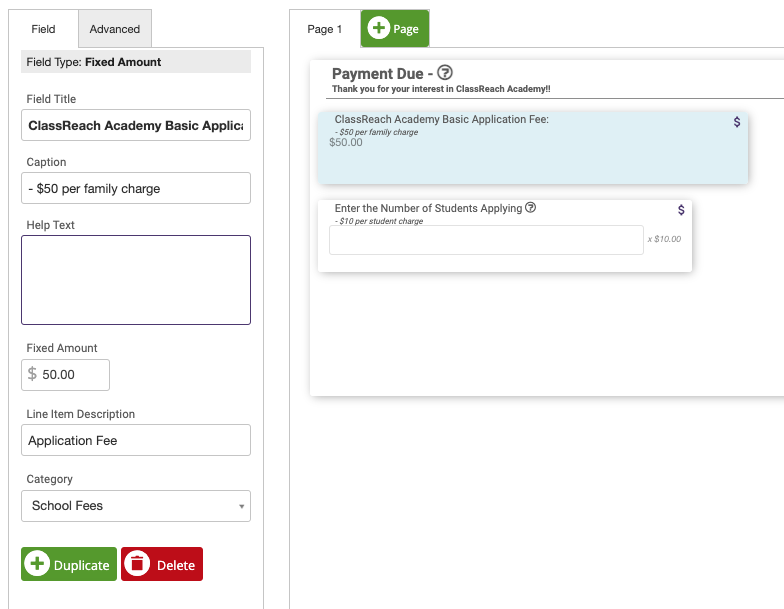
Building the form. This form collects a $20 application fee per application plus $200 per student. Both fields are shown here as one possible implementation. You could use one fixed fee or a variable fee per student or both.
There is only one page on this form –

There are two fields on this form. The first field is a Fixed Amount payment field. Set the amount to any dollar amount you choose. The Finance Category you choose is important and should be categorized as you desire. This is an accounting choice.
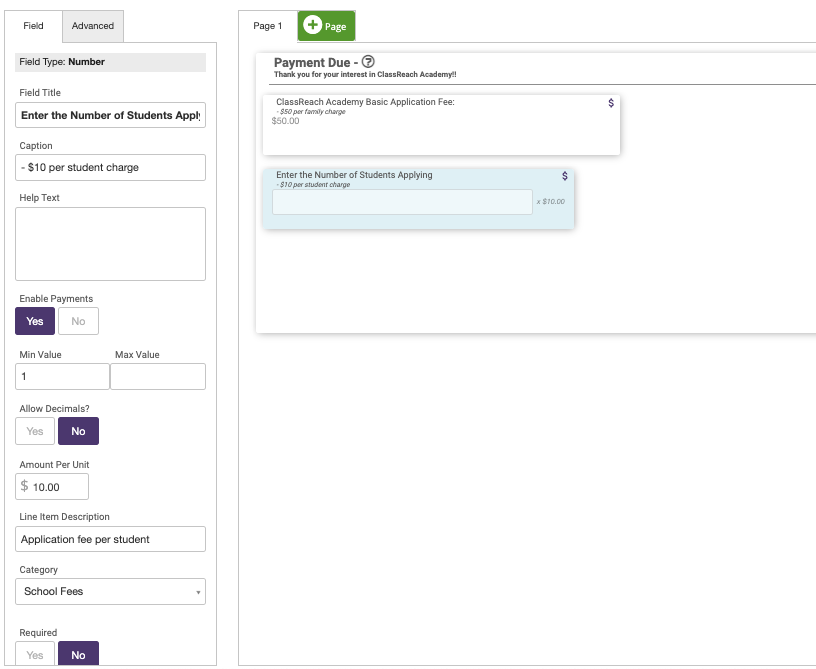
The second field is a Number type field. The purpose of the field is to take the number of students applying and multiply it by a set amount/per student application fee (any amount you choose). The applicant enters the number of students they are wanting in the school and the form does the work to calculate the fees. The Finance Category you choose is important and should be categorized as you desire. This is an accounting choice. You have the option to add a line-item description. This will show in your Financial records on the transaction screen and on the invoice and may be helpful for tracking payments. If you use this field we recommend making it required.
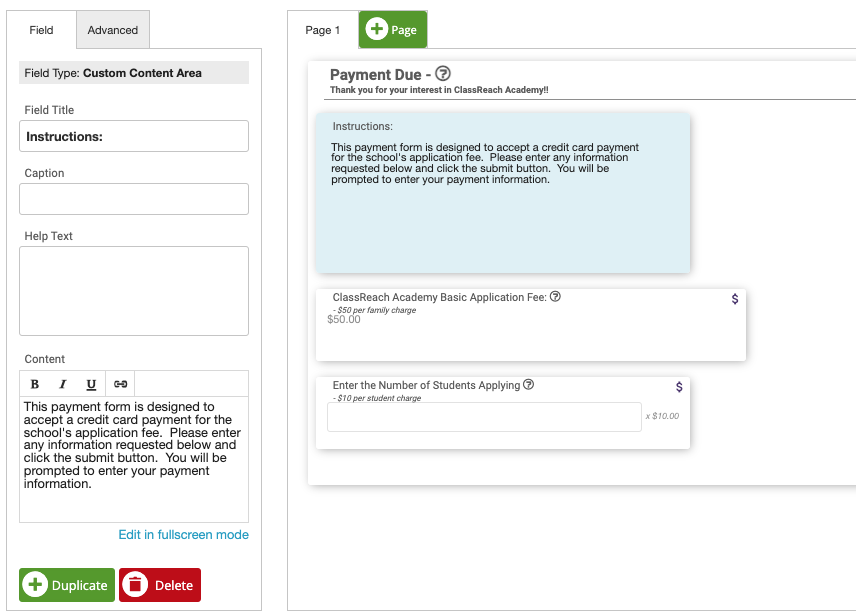
After you've added a payment field or fields into your form, we also recommend adding a Custom Content Field with any instructions you have for the guardians regarding this payment form.
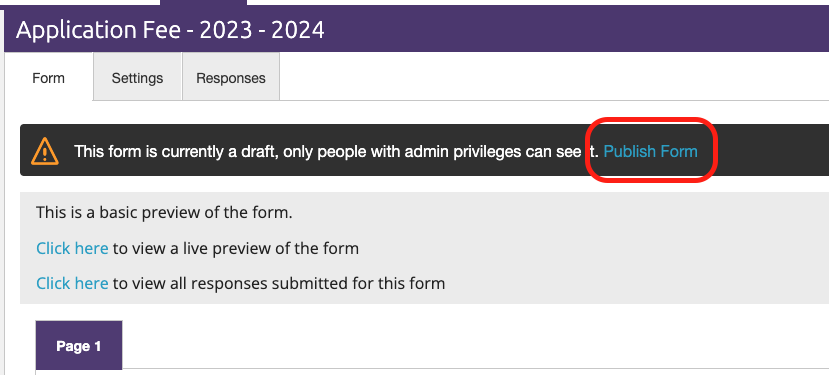
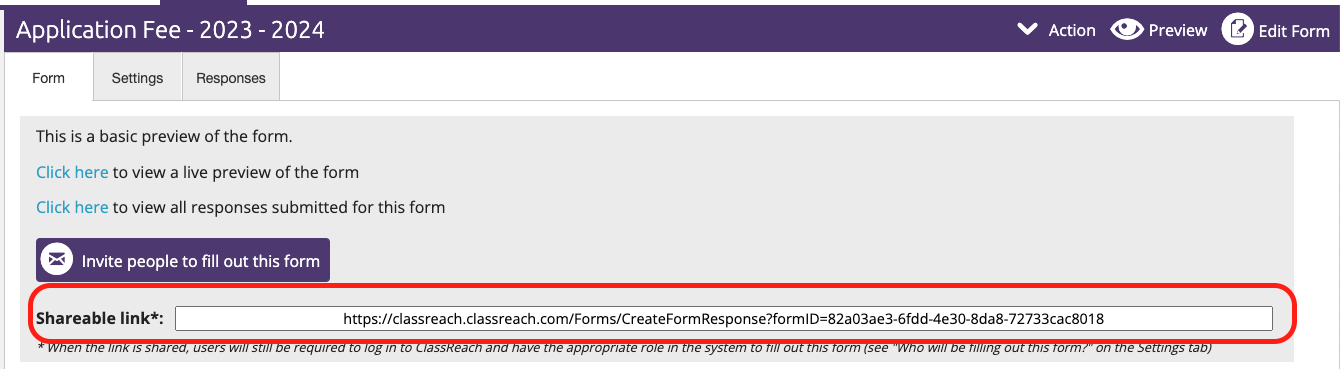
Click Save (upper right corner) and then you should click Publish Form. This will allow you access to the shareable link as well as make the form active.
Lastly, copy the shareable link in order to paste it in your application.
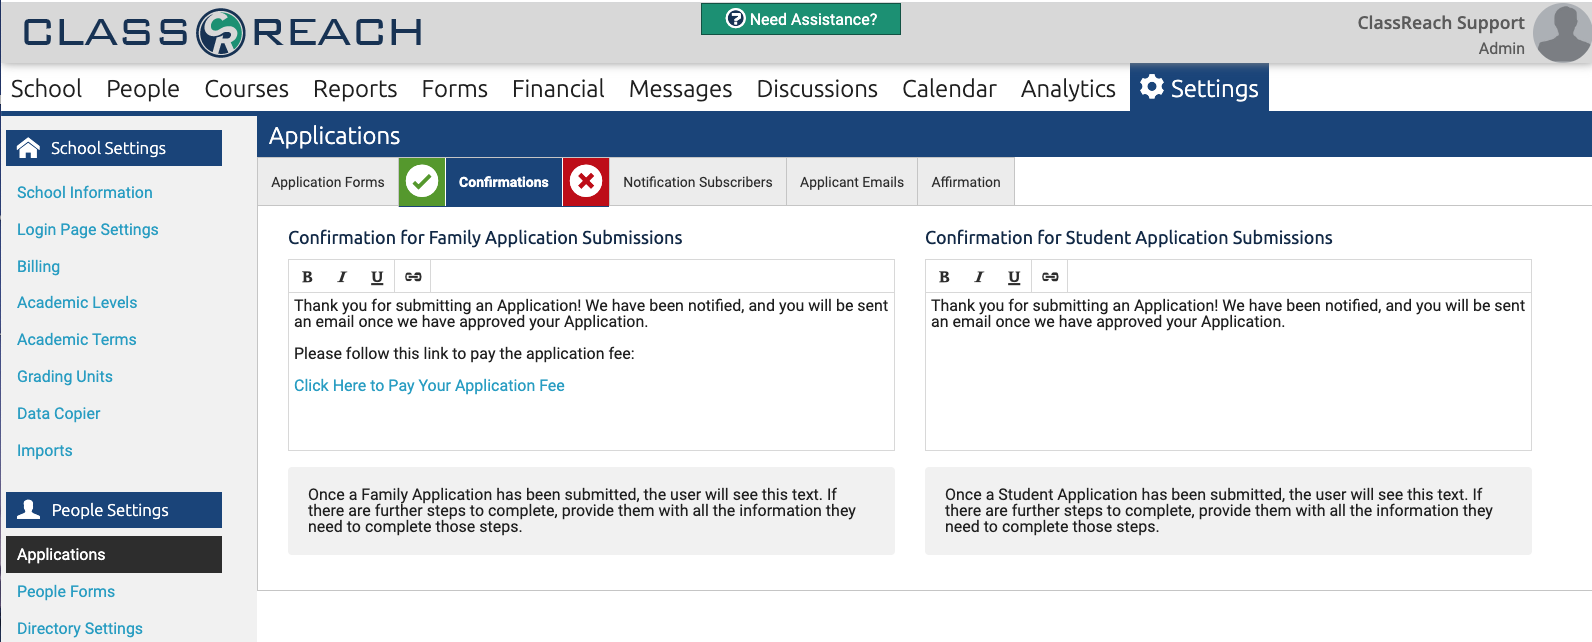
Linking the Form into the Application Confirmation Pop-Up Screen
To get the form to the applicant, we recommend putting a link on the Confirmation Pop-Up Screen as you see below. This is found in the Settings, Applications page. Note, if you plan to charge an Application Fee for a Student Application you can also put the link here on this page.
To edit these fields, click on the pen and paper icon next to the Confirmation tab.
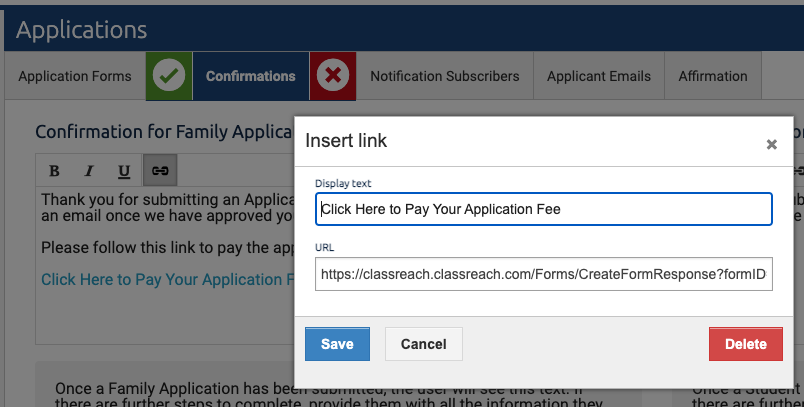
- Enter the text for your link
- Highlight the text
- Click the link icon (found above the text field. Its the chain link icon to the right of the Bold, Italic and Underline buttons)
- Paste the Application Fee form's URL in the URL field
- Click Save in the bottom left of the "Insert Link" window.
- Click the Green Save button next to the Confirmations tab.
This completes the Application Fee form and links it to your application. We recommend testing the form along with your application before you make it live for your families.